Revamp Your Living Room with a DIY Fireplace Makeover
I don’t know about you but if I’m left alone in a room too long, I start envisioning all the ways I could improve the flow of the space or spice up the decor! No, just me? Well that’s exactly what I did after spending yet another day (stay at home mom life, am I right?) staring at the empty walls in our living room. We had this big open wall that has been taunting me since we moved in and I knew I wanted to make it more of a focal point & add a statement piece to it. I grabbed my handy dandy painters tape and “drew” up a fireplace layout.
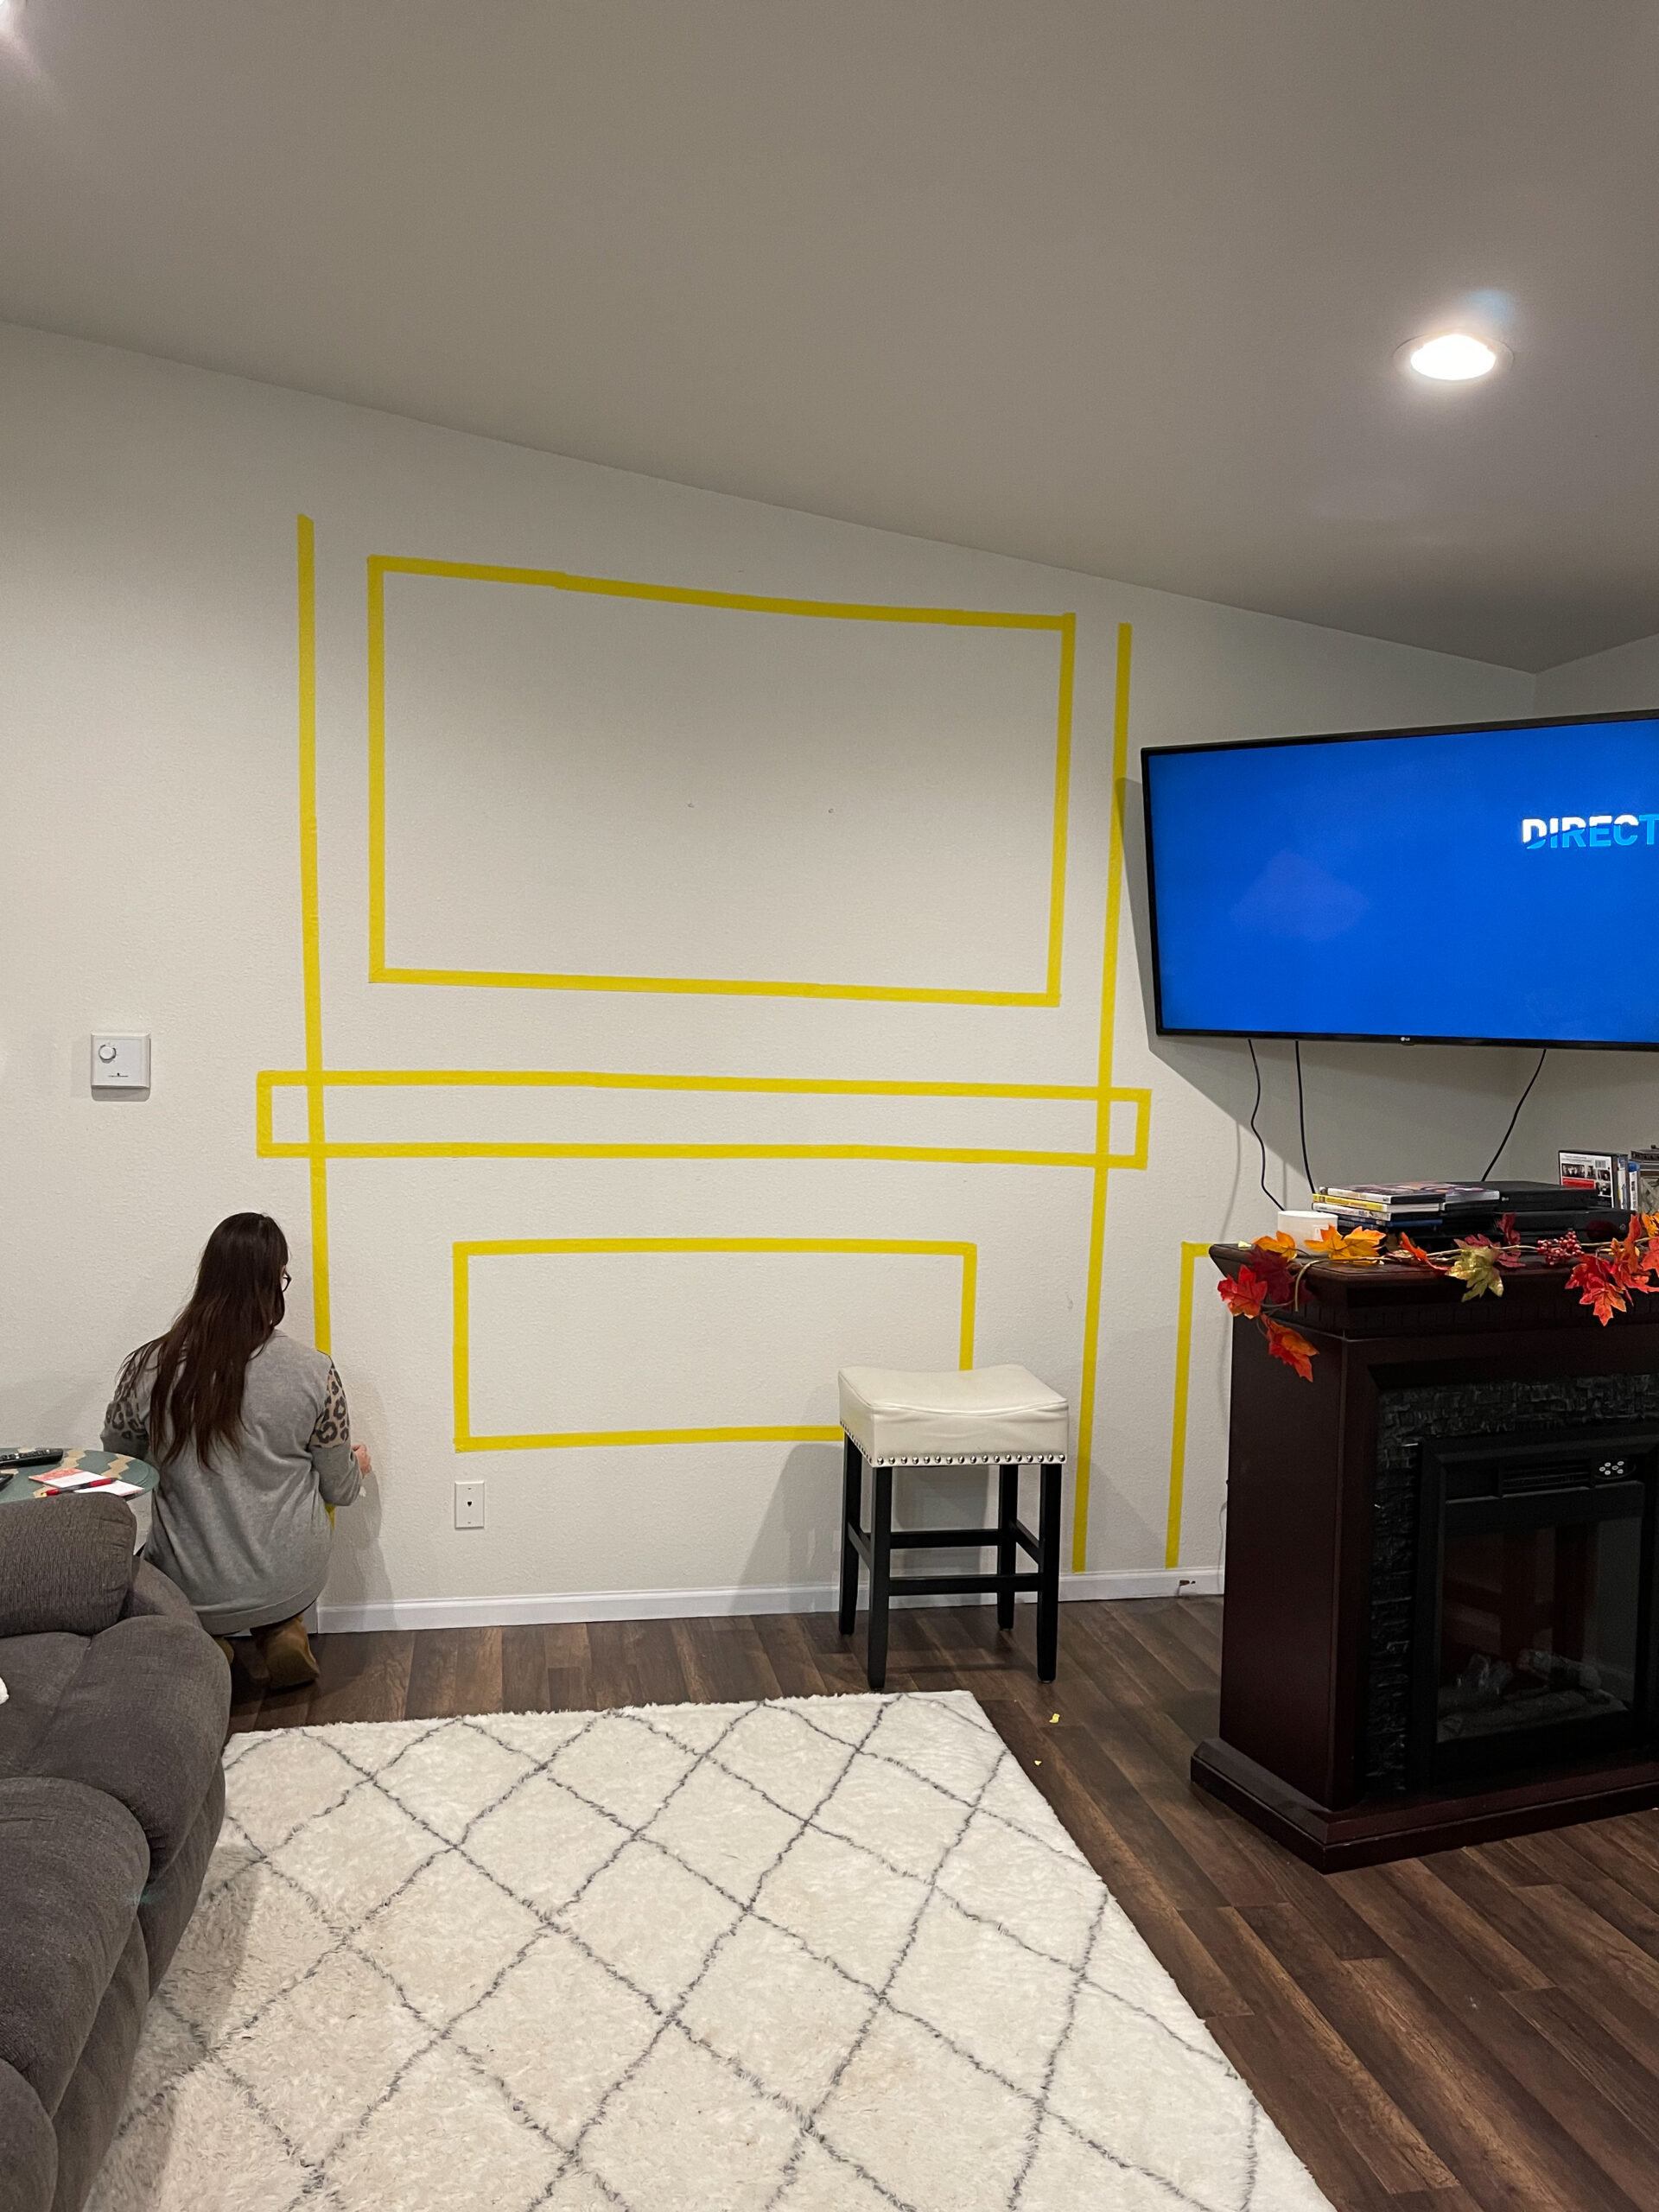
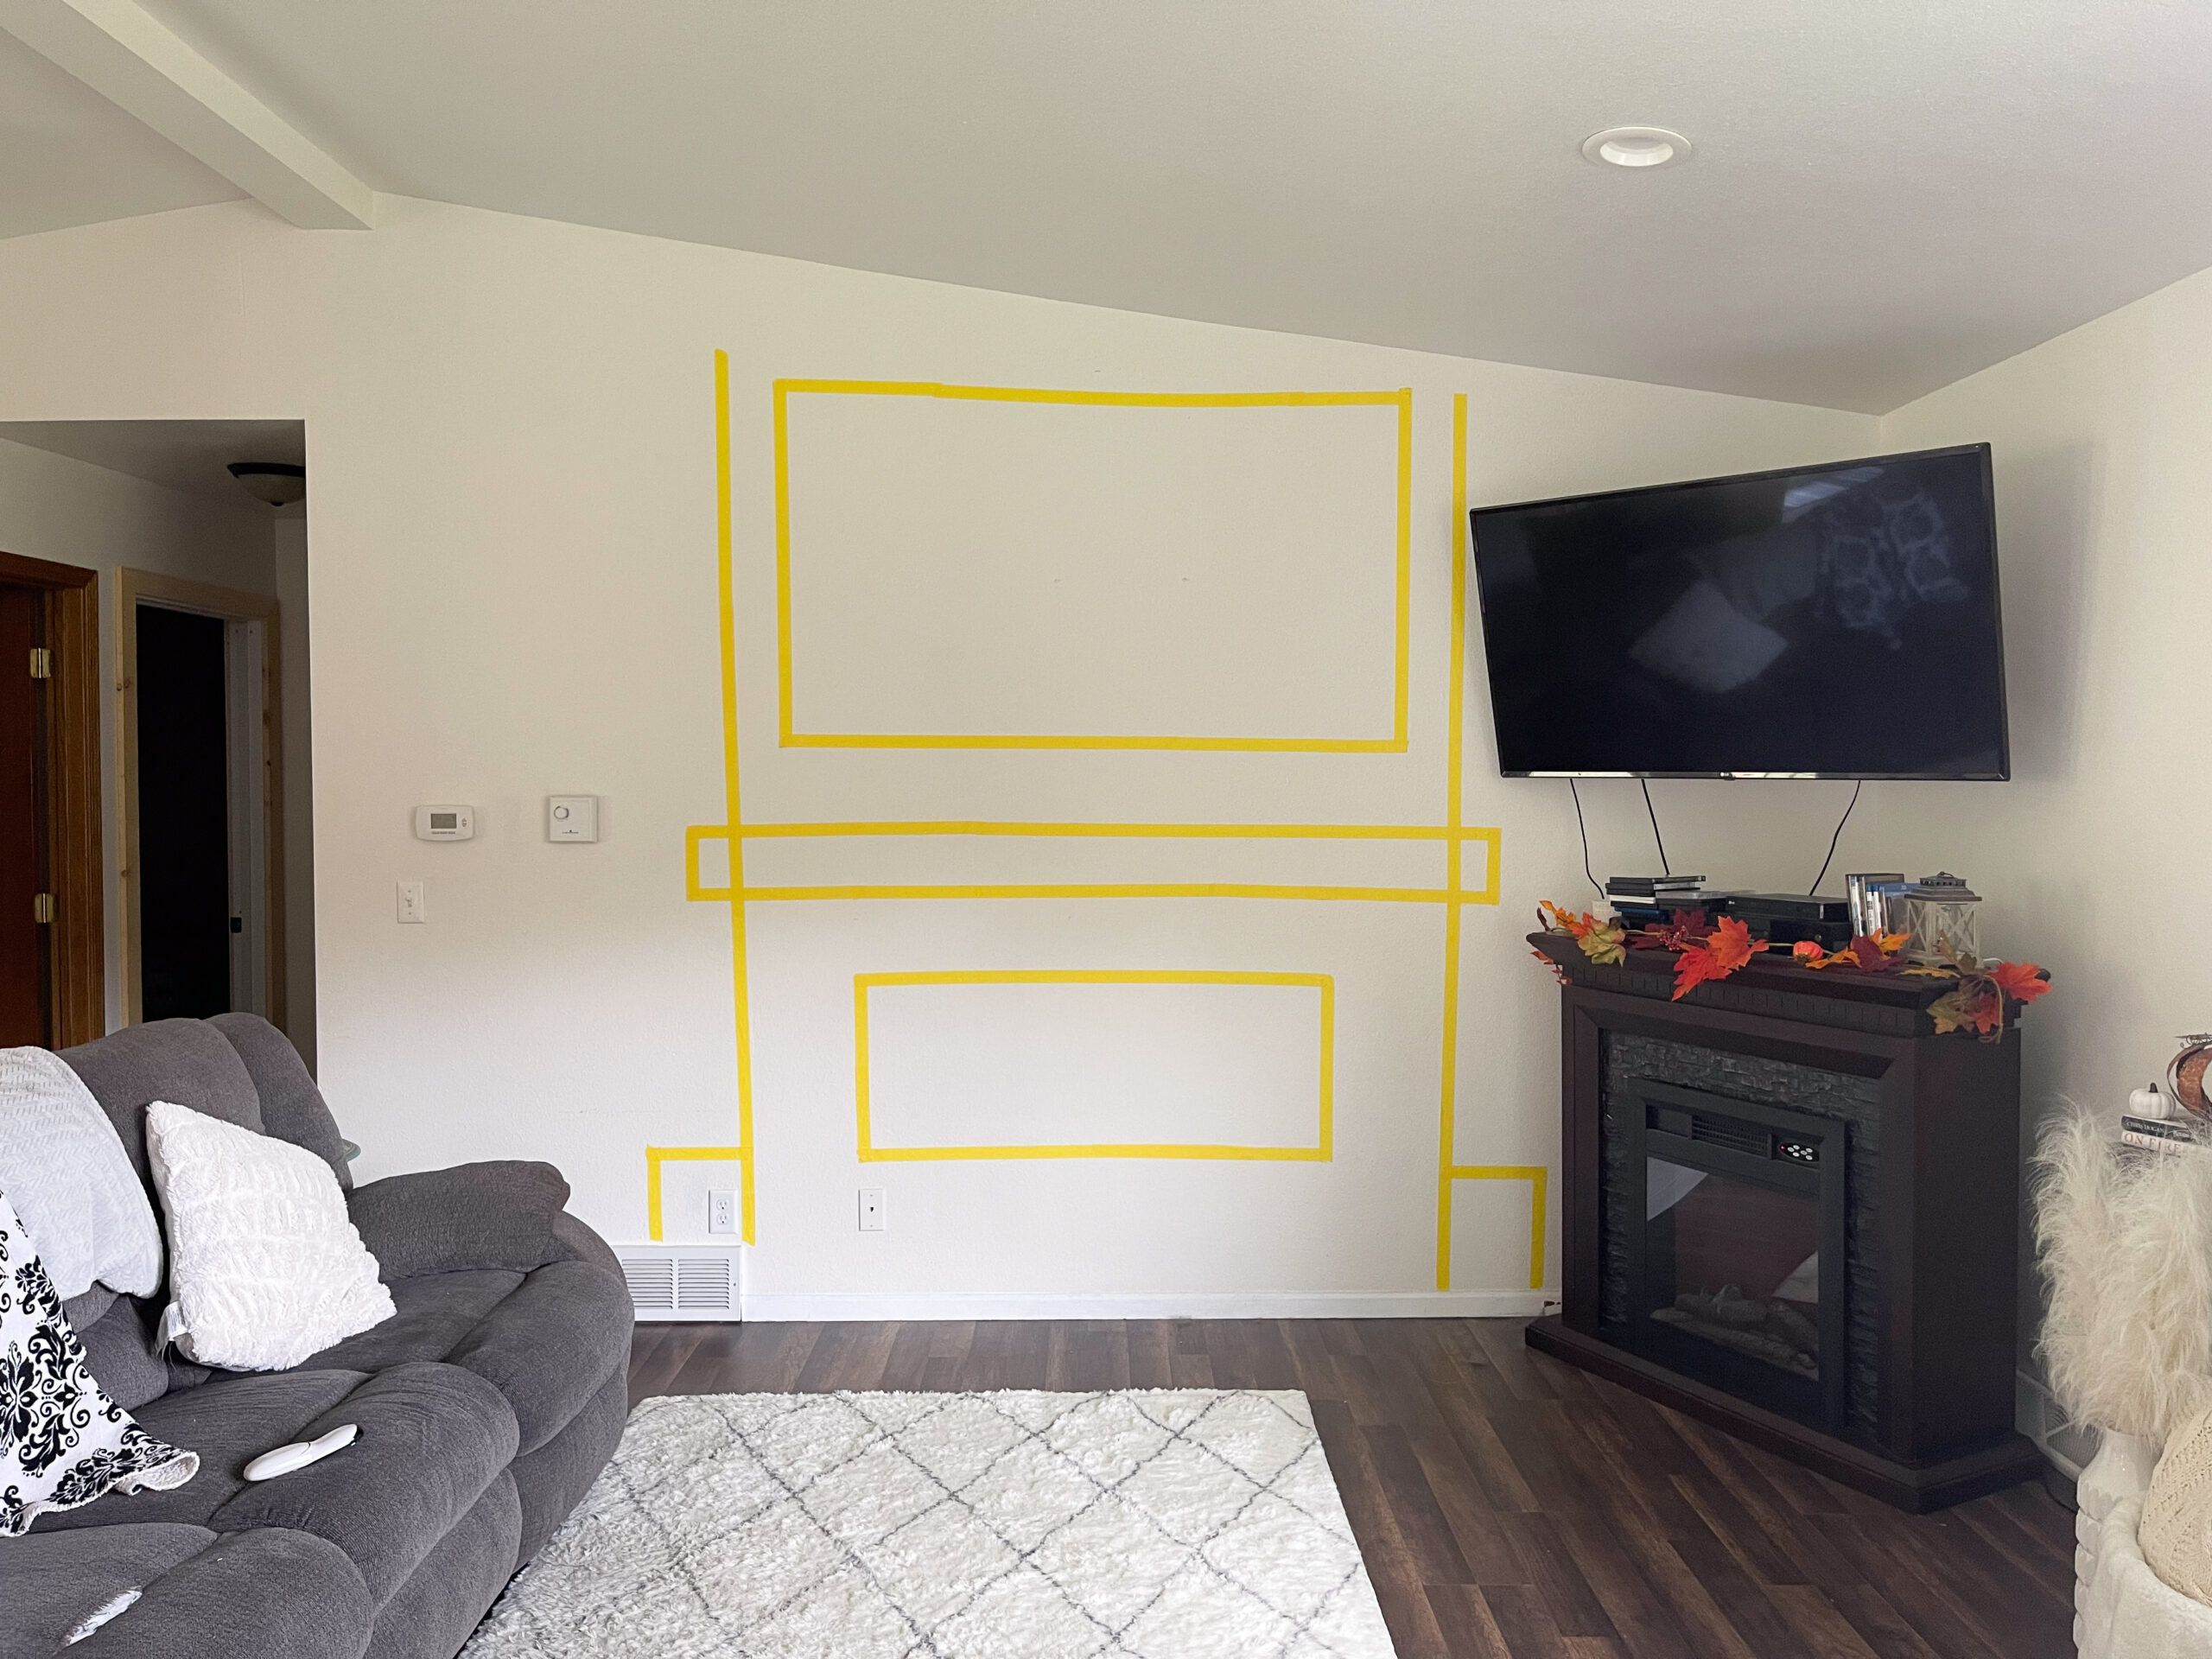
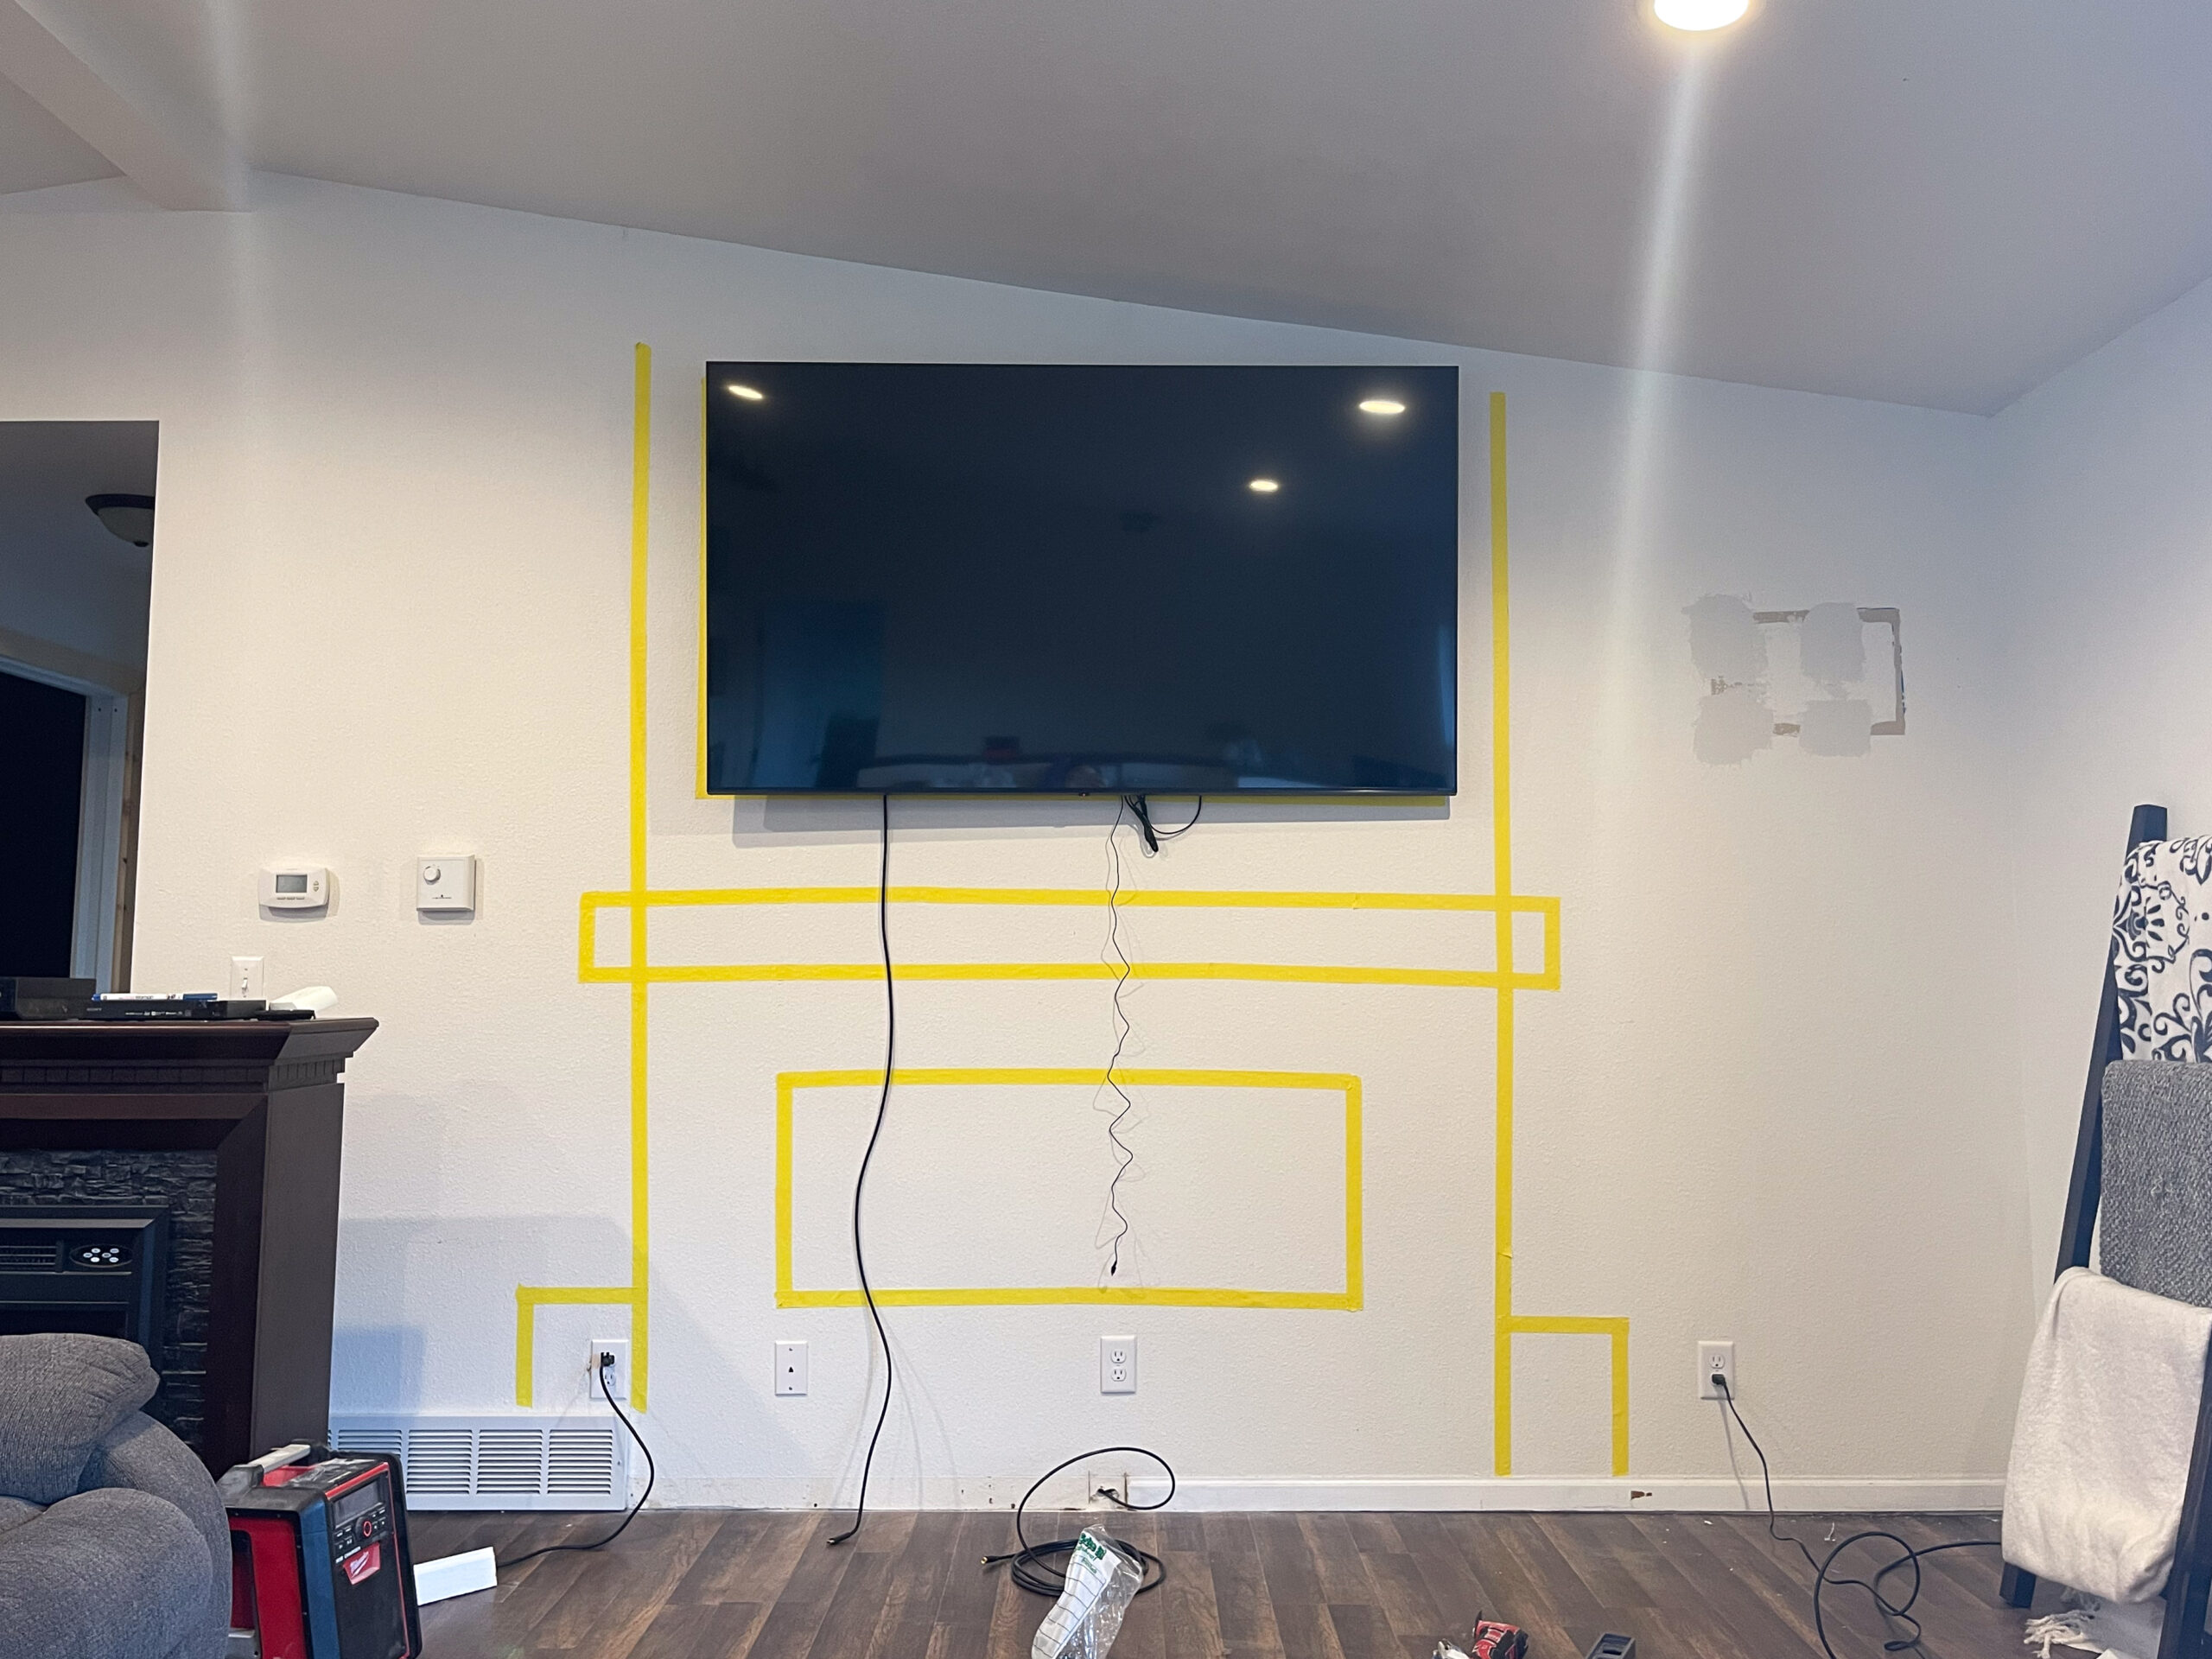
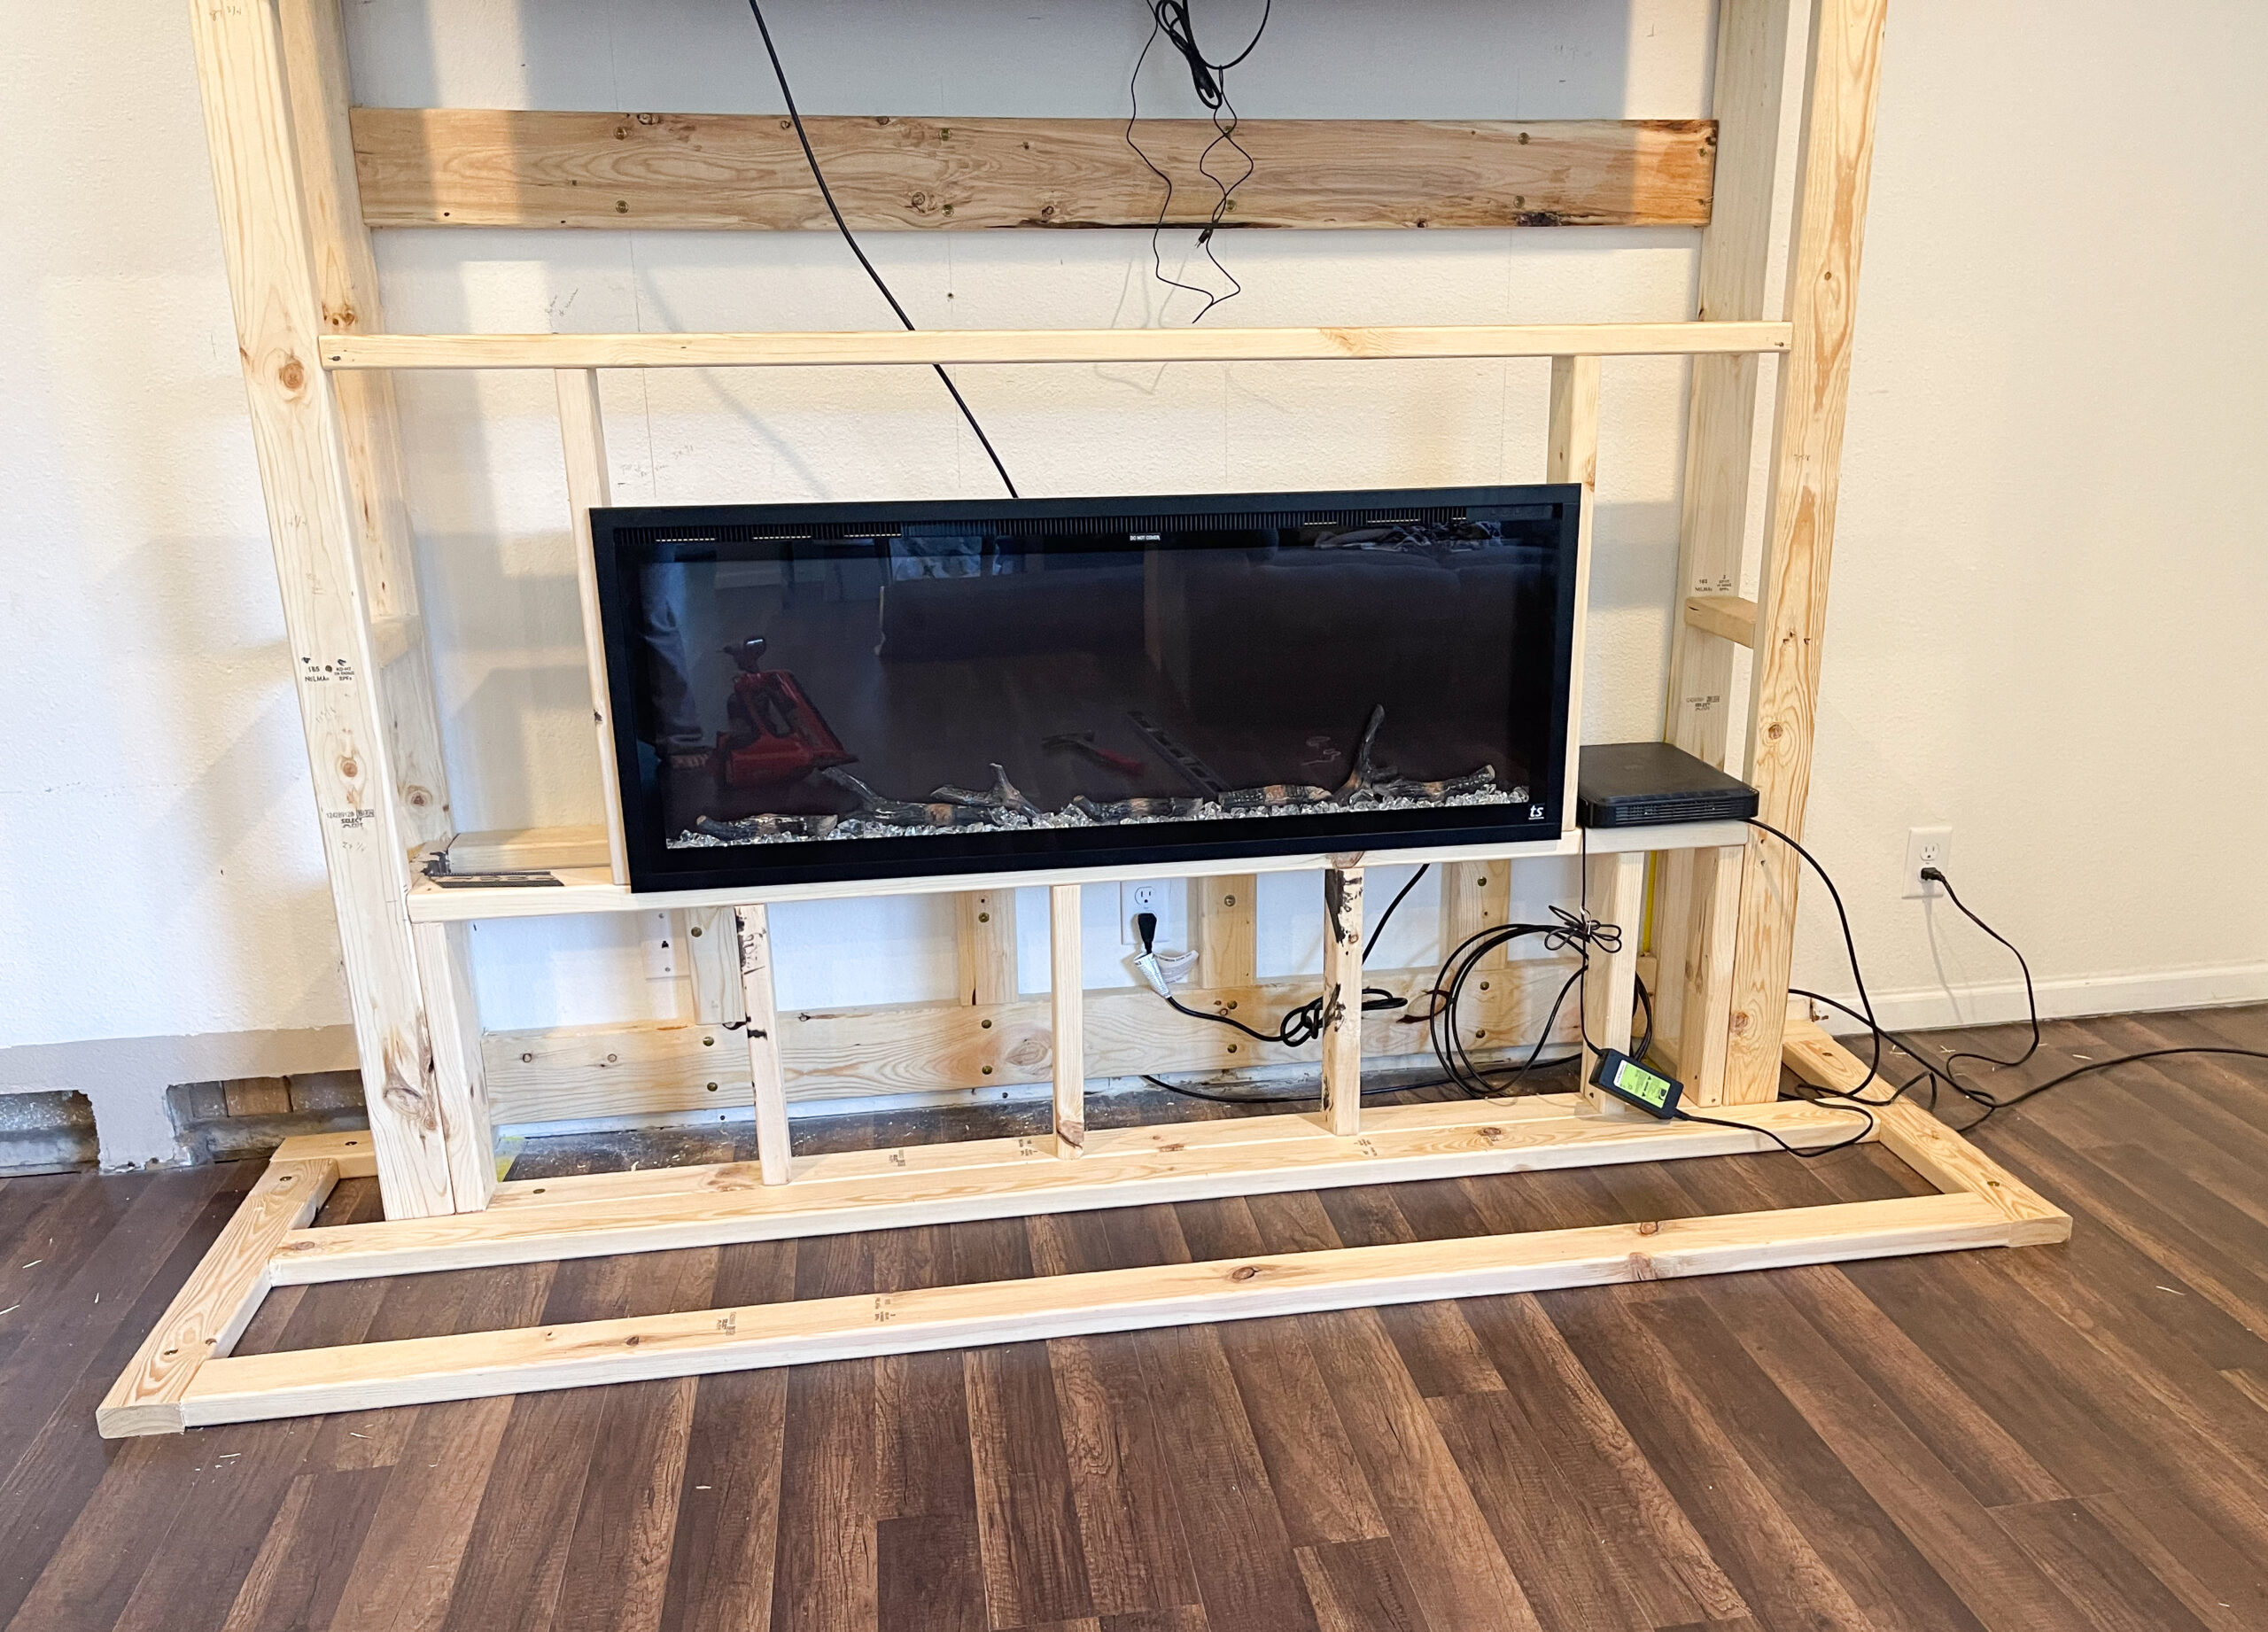
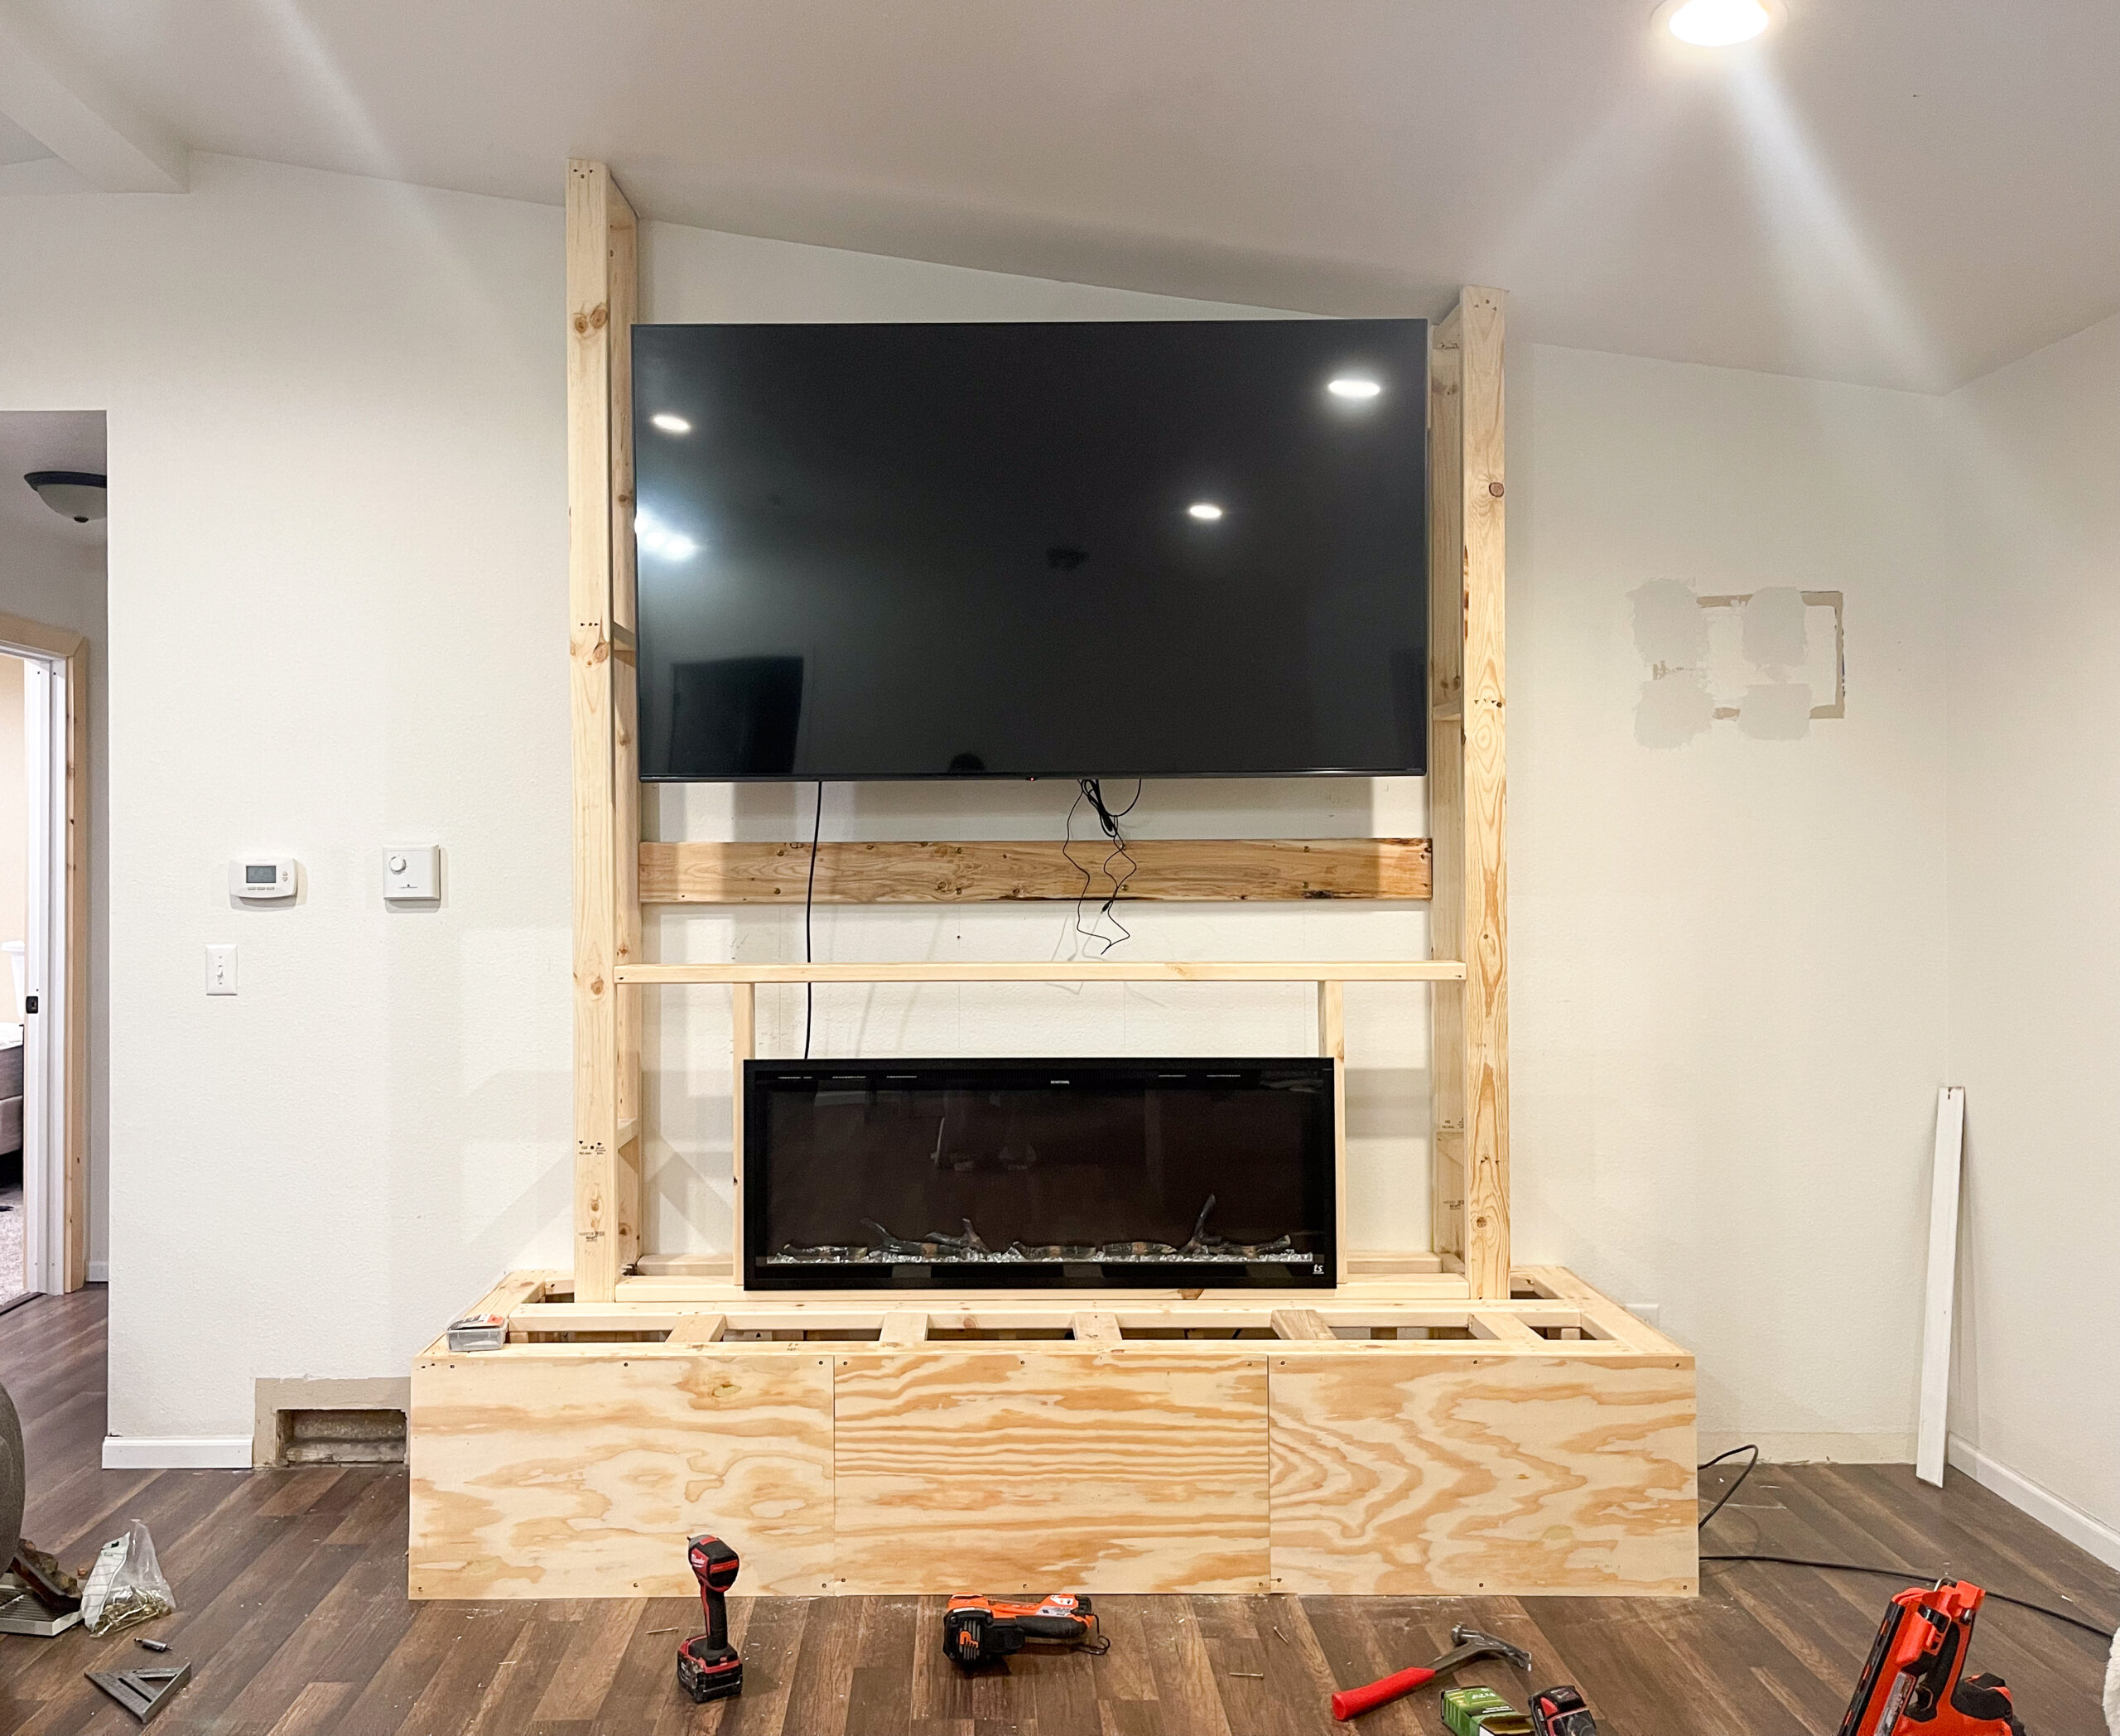
Once I got the basic idea planned out we moved the TV to to the center of the fireplace – we did plan on getting a bigger TV before this was finished so we measured out the space based on a bigger TV!
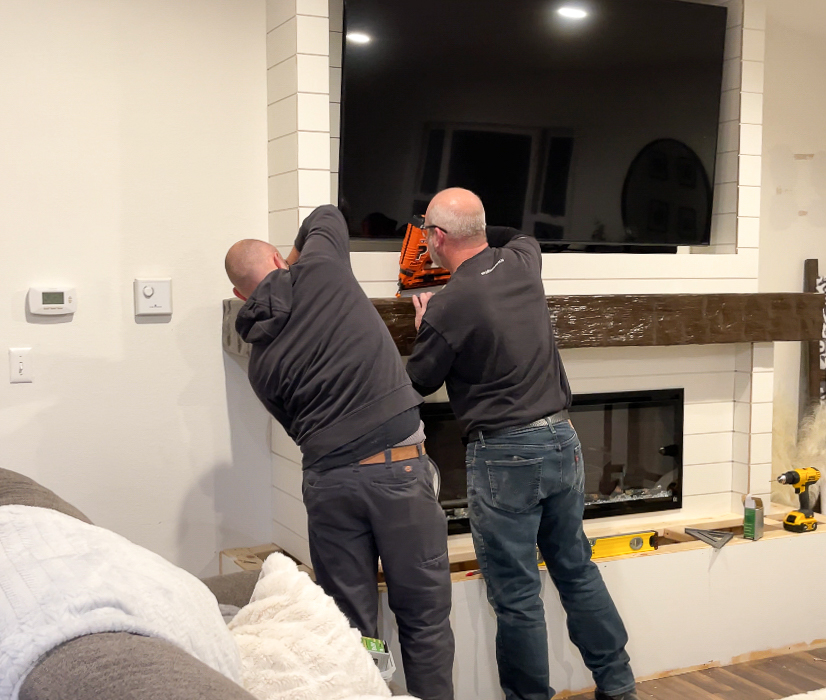
Then it was time to build! *Enter husband who brings all my visions to life!* He got to work framing the sides and center where the electric fireplace will sit along with starting to get the measurements and framing done for the hearth we planned to wrap around the fireplace.
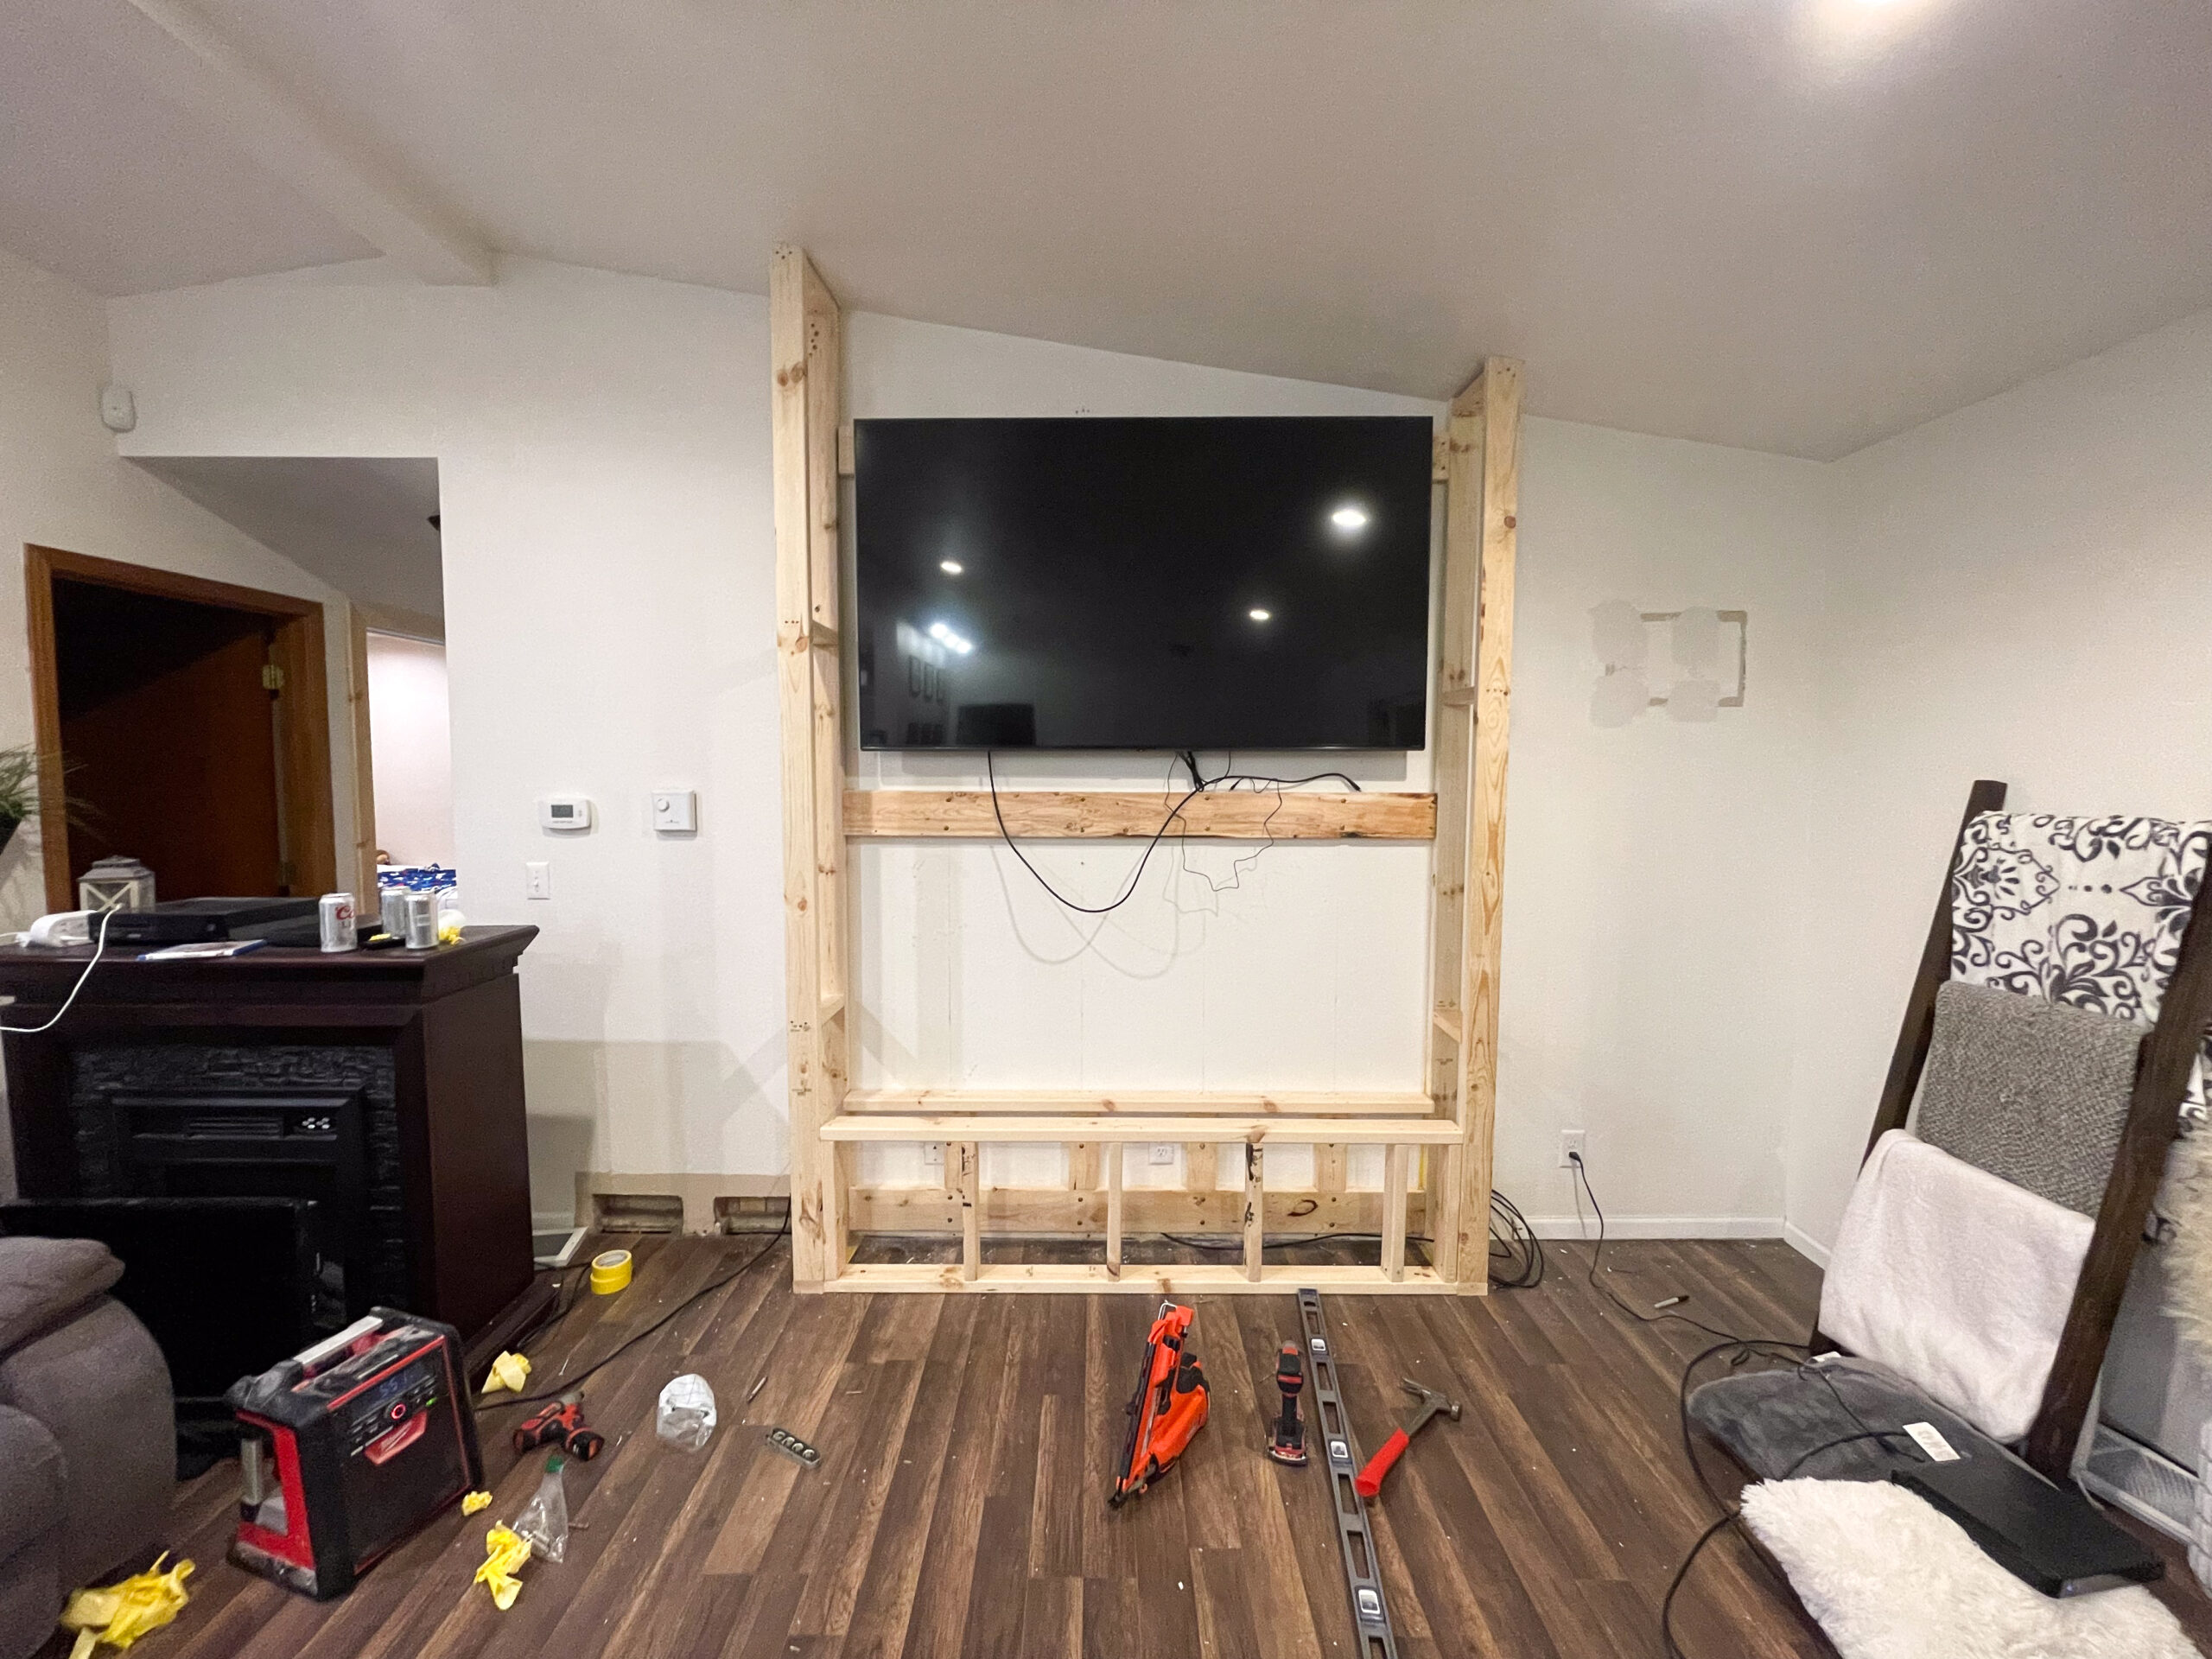

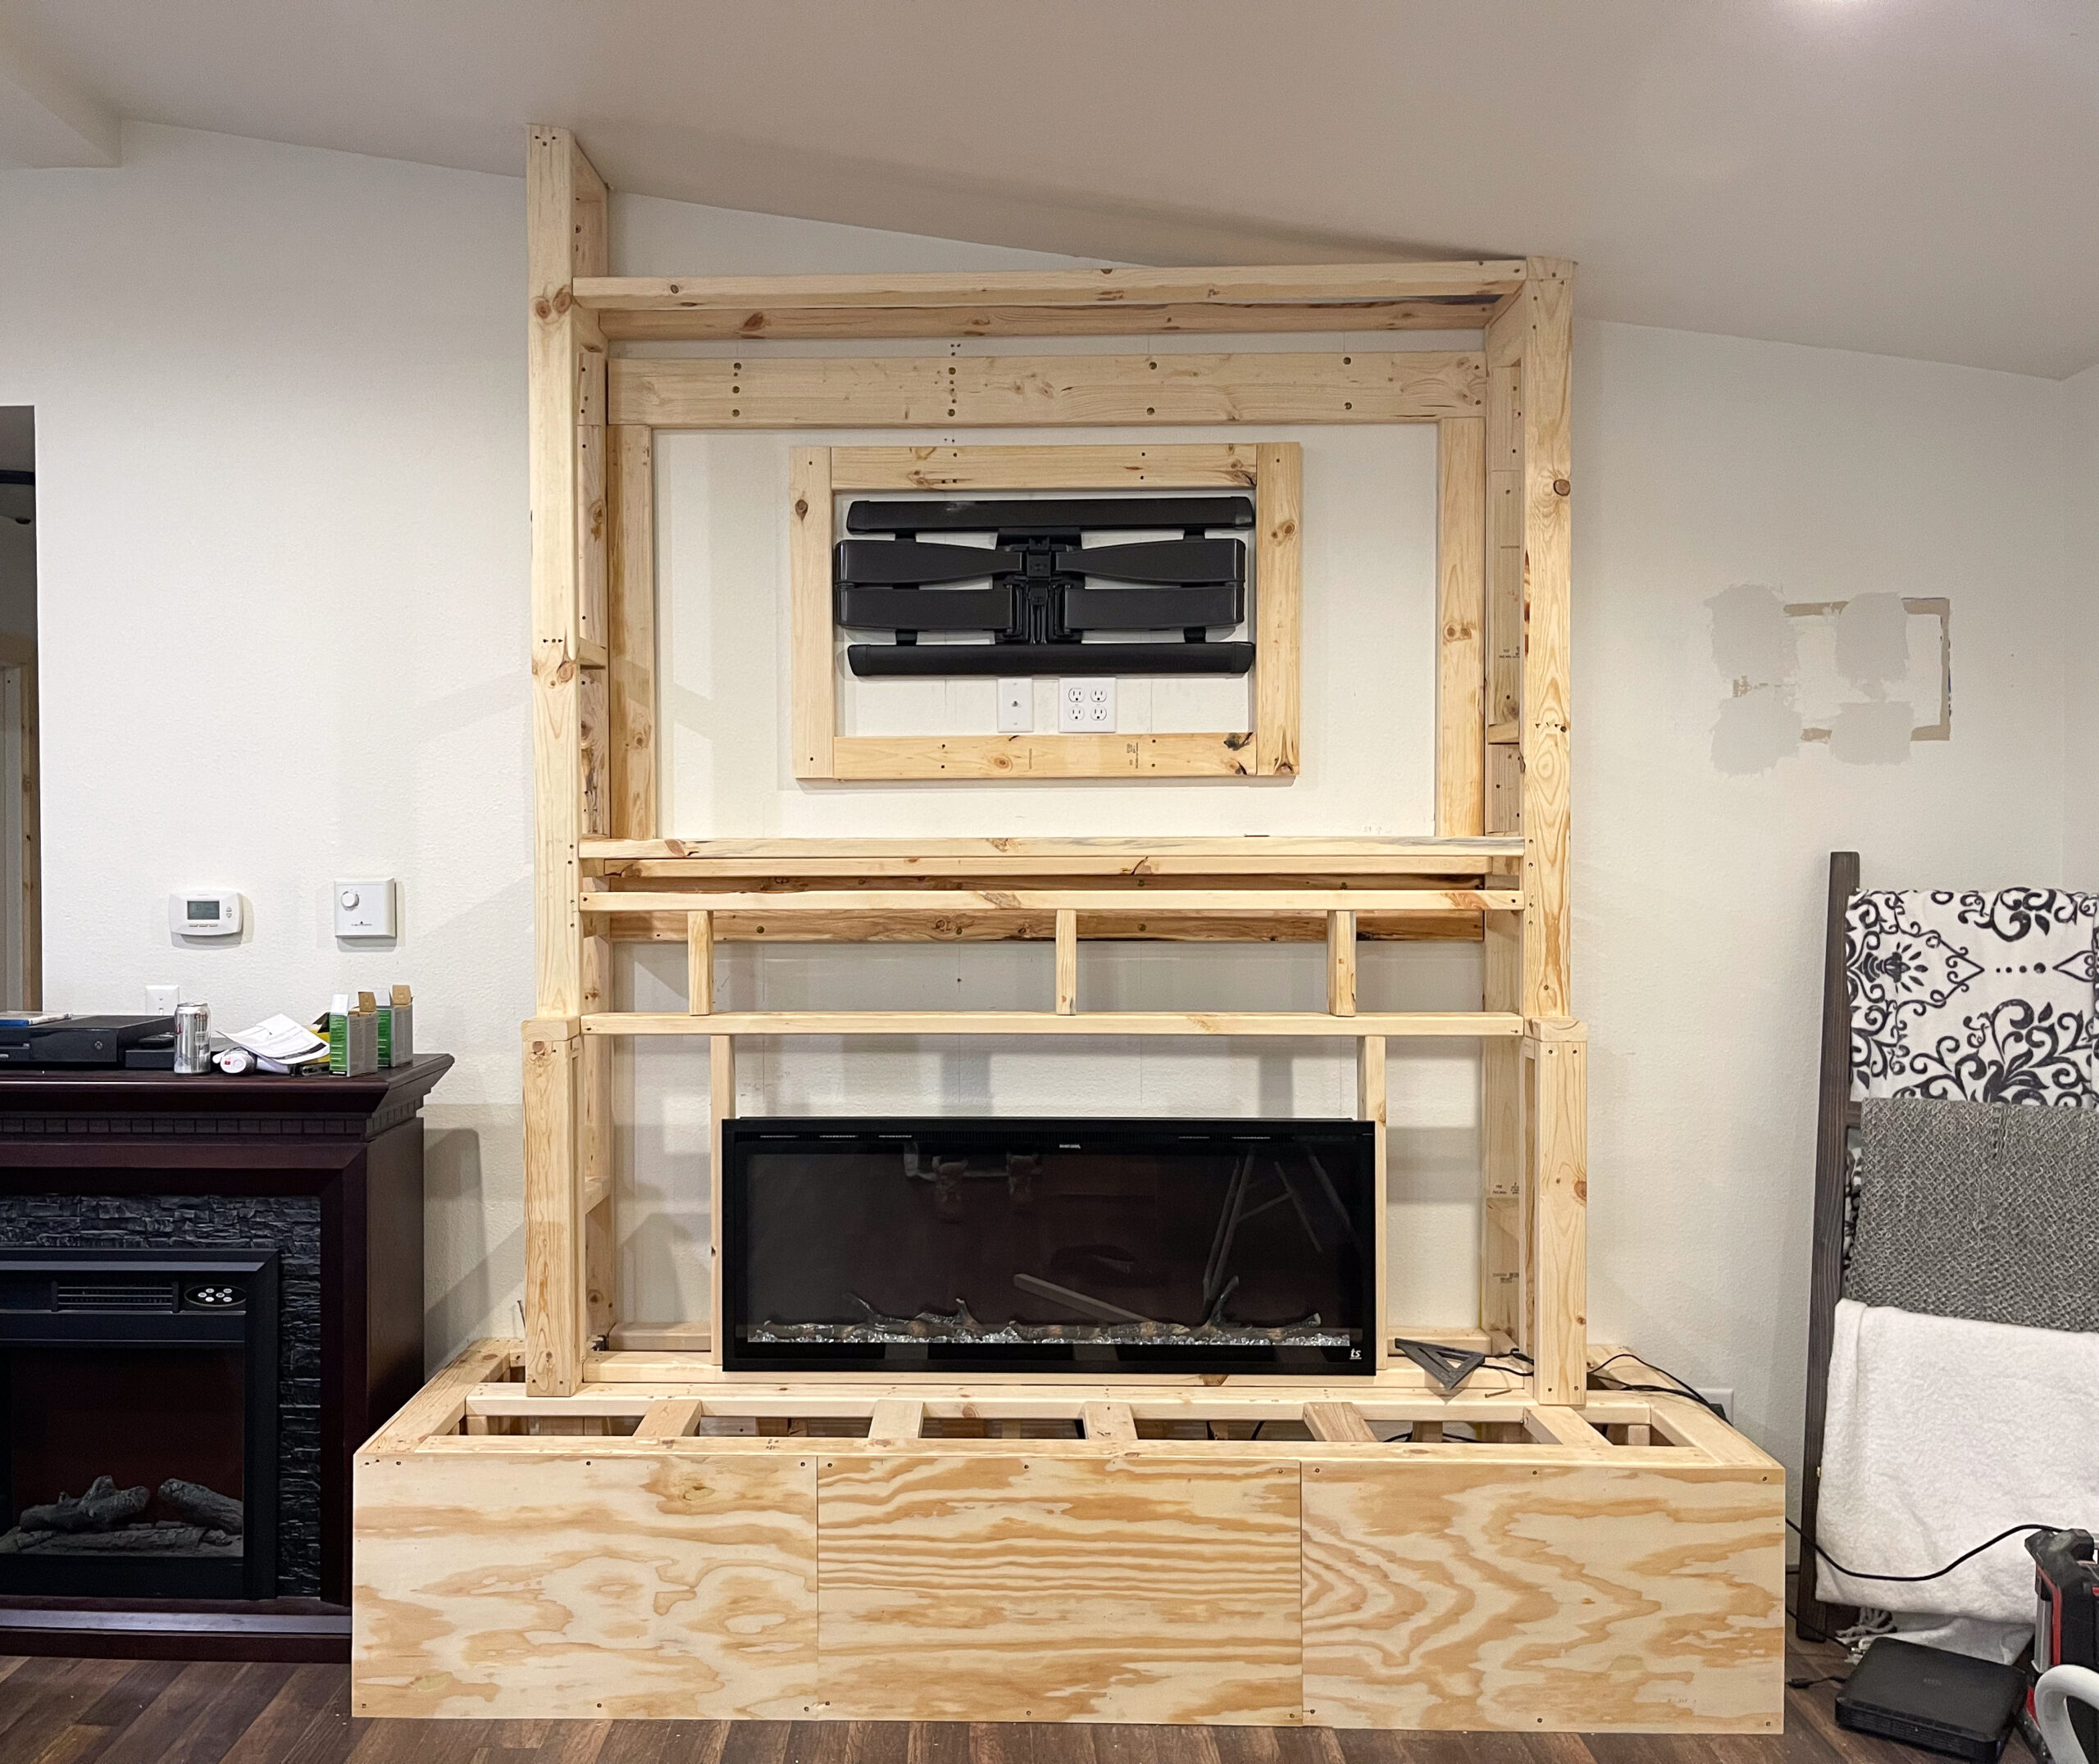
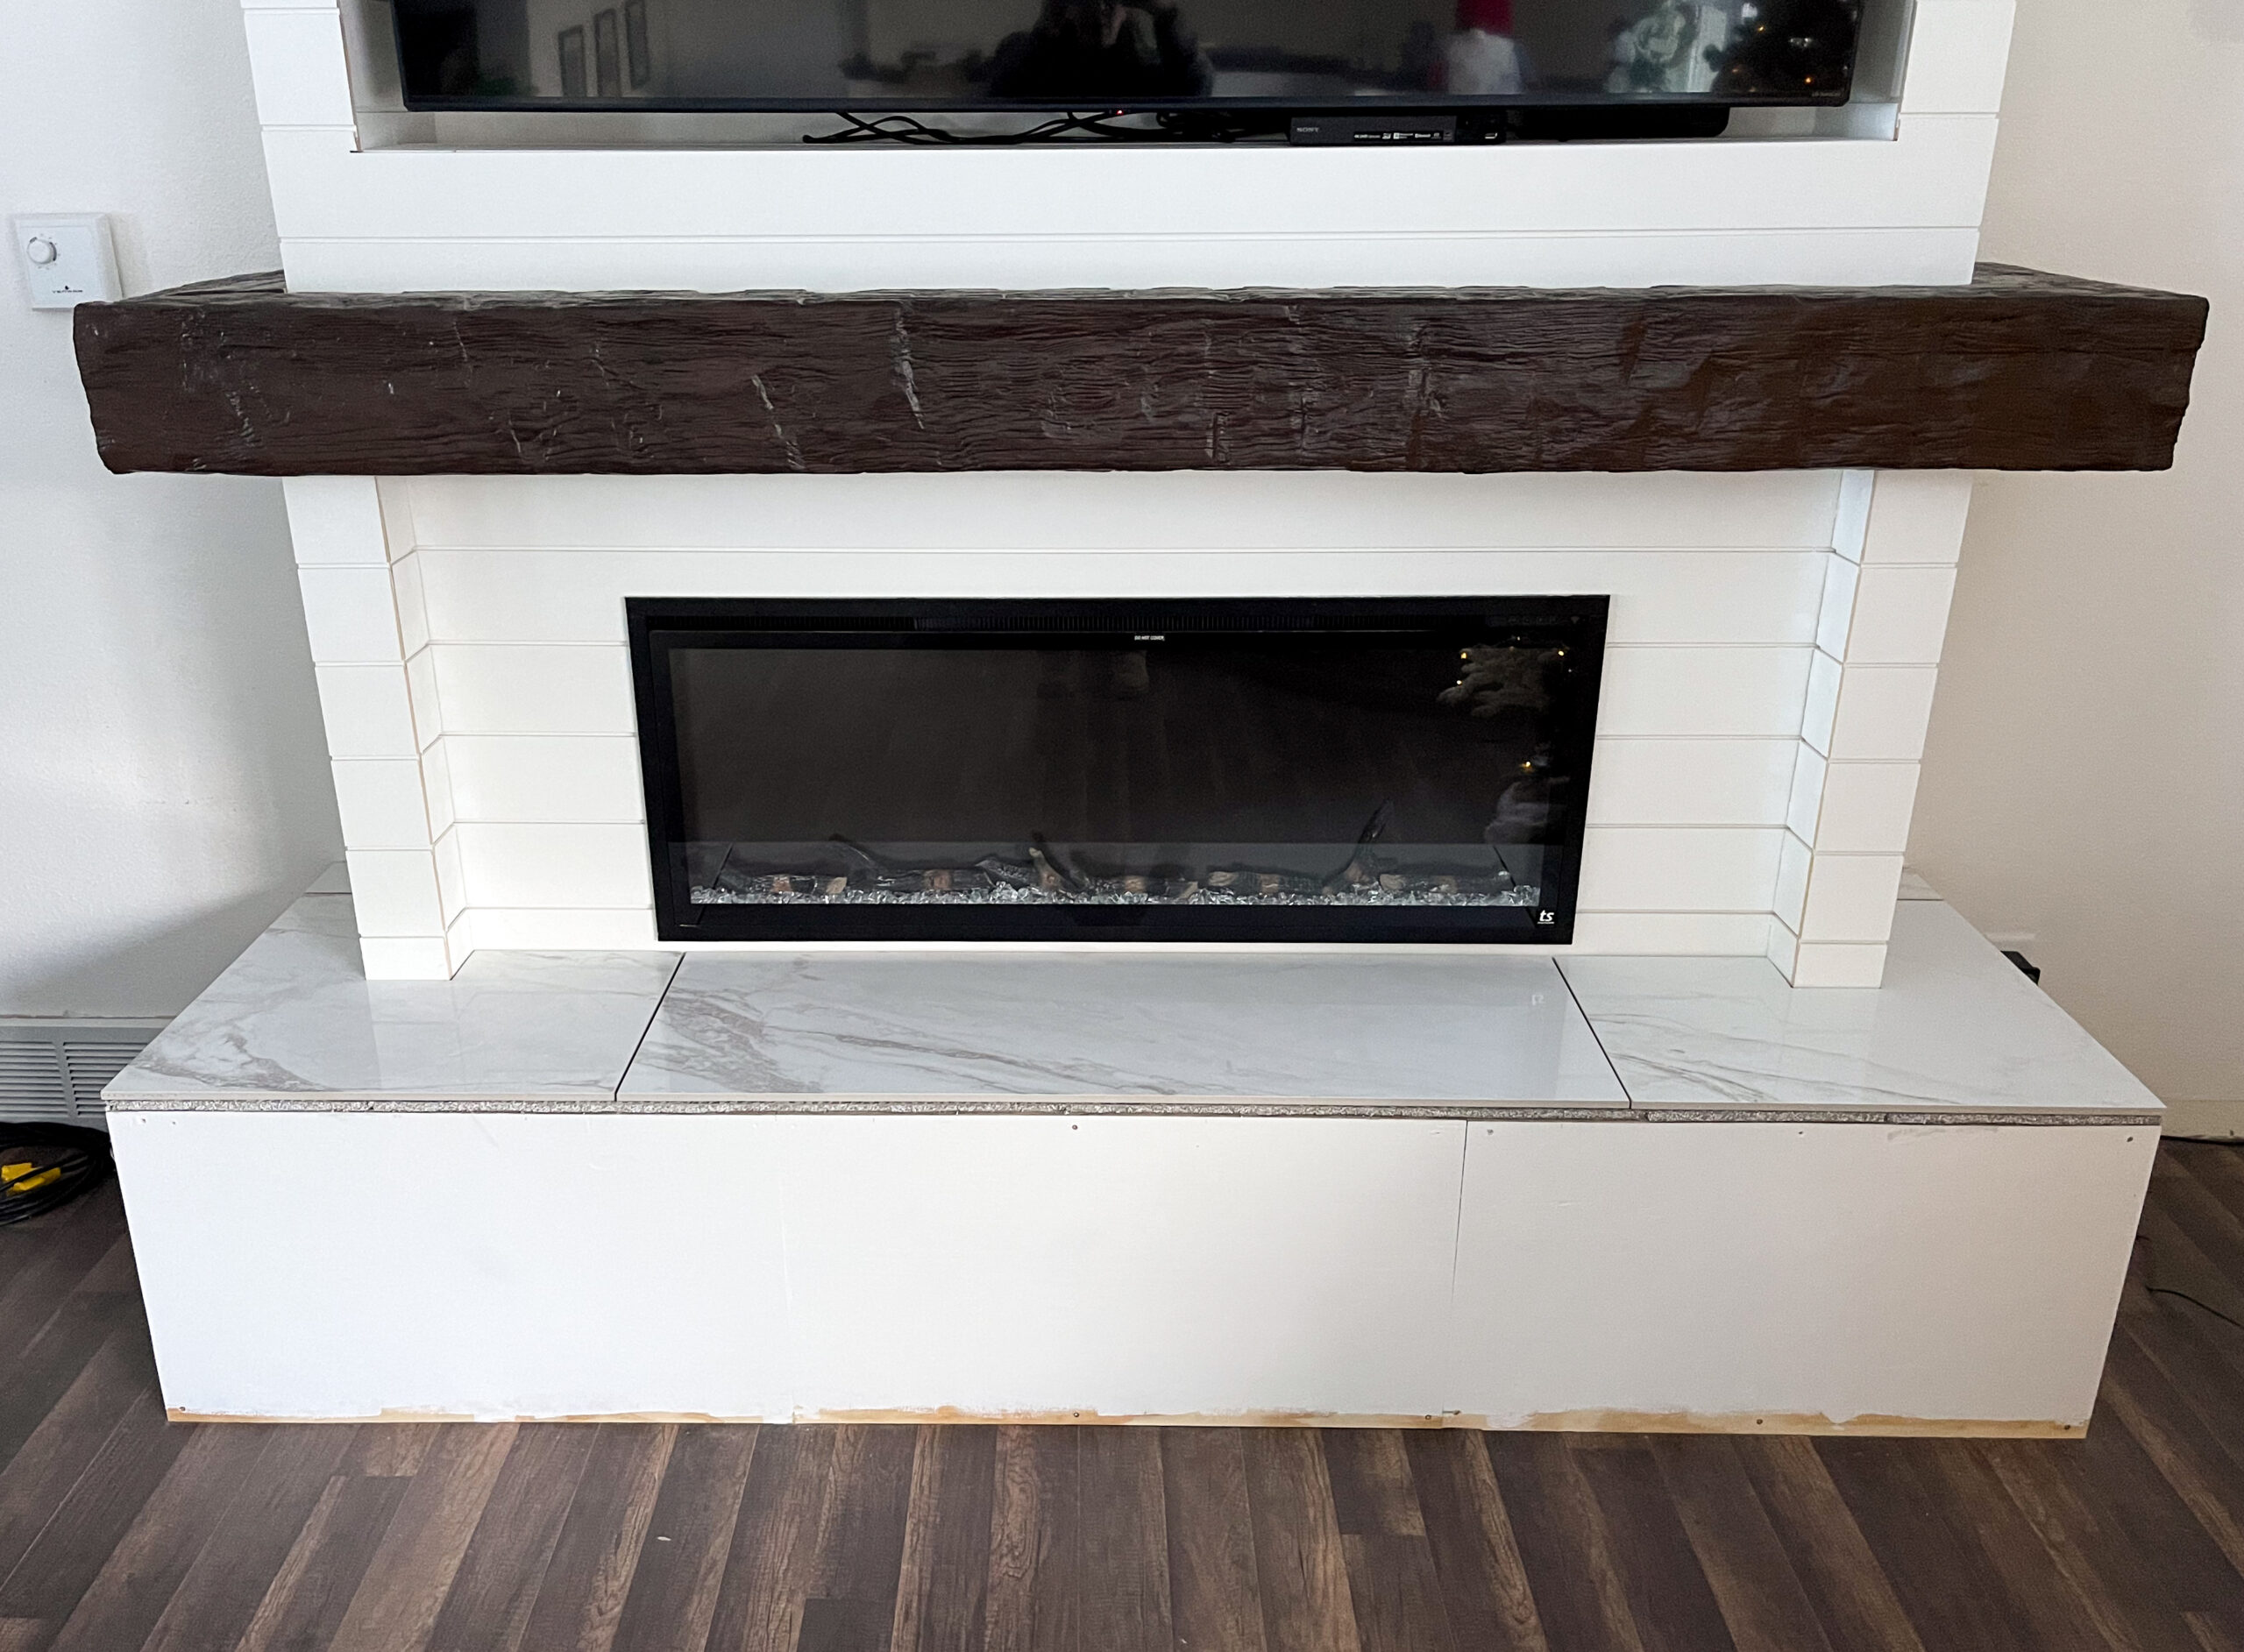
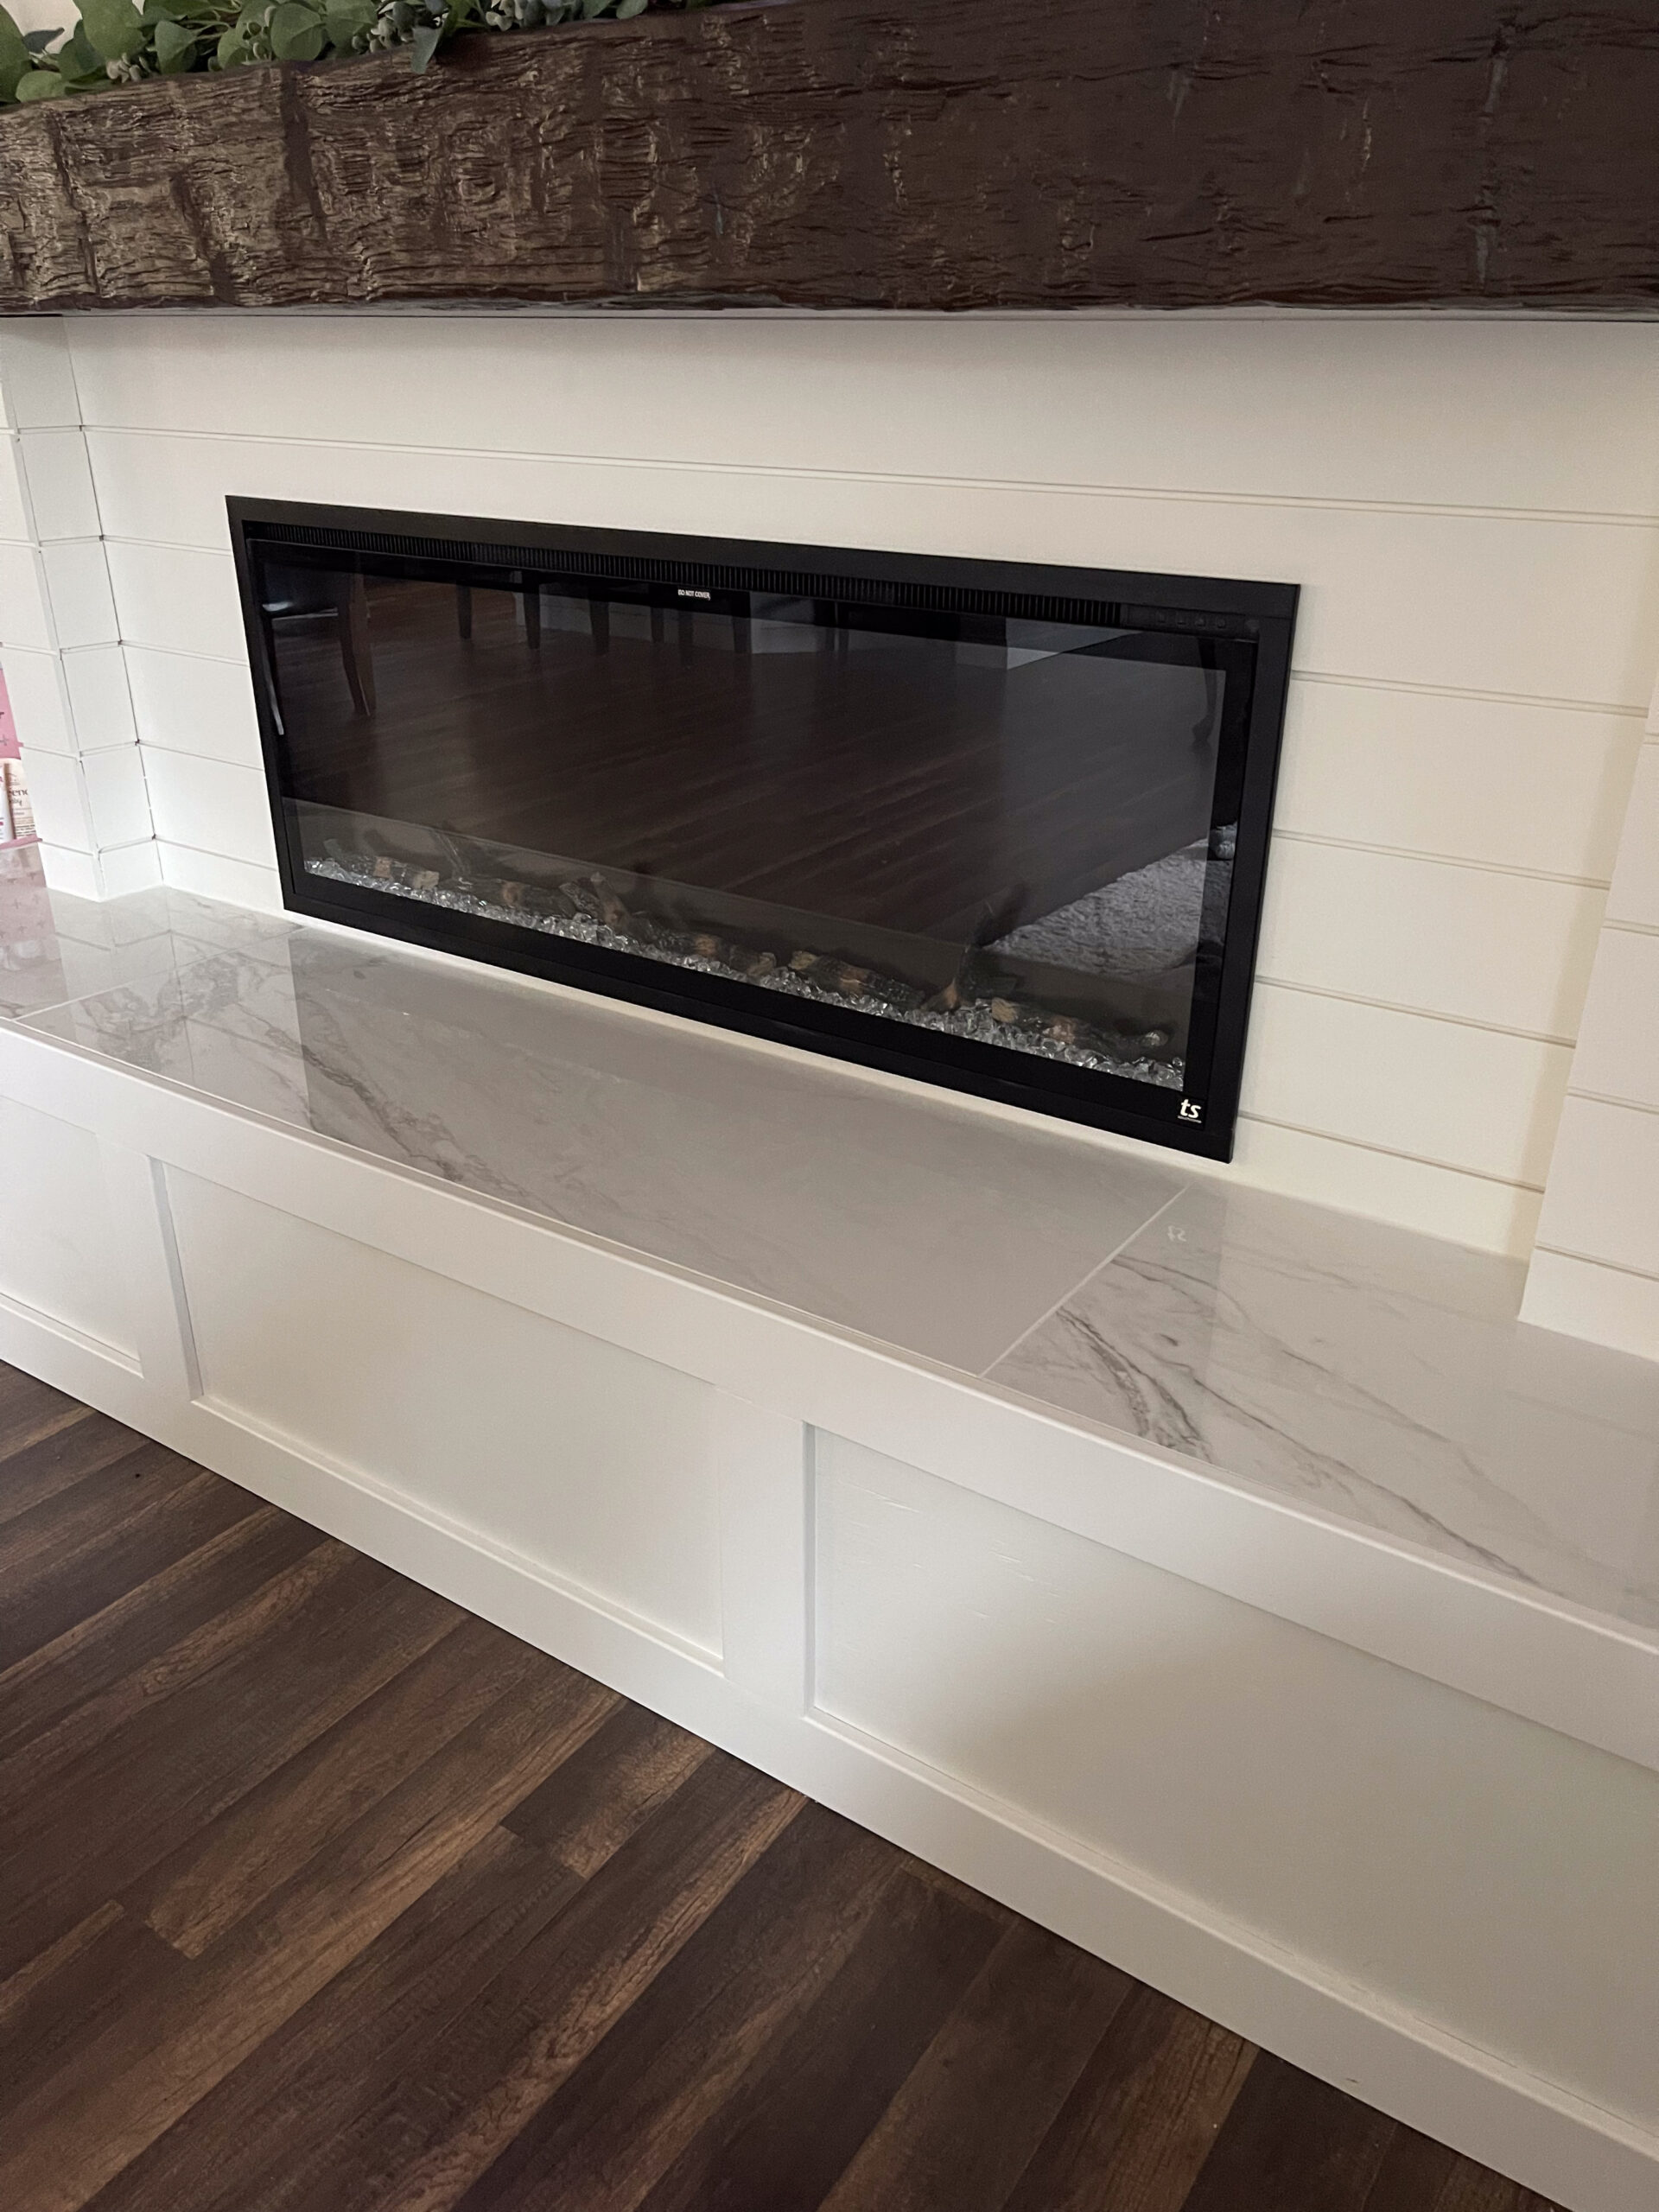
Once he got the base frame up and the fireplace in we got the hearth in place! I debated for a while on if I wanted the hearth to wrap or be the same width as the face of the fireplace and I ultimately decided to wrap it. If I was going to do it again, though, I’d probably keep it the same width as the fireplace so built-in’s could be flush with the side of the fireplace.
The dimension and texture of the hearth and mantle from a visual viewpoint in the home is far superior than it being flush I would say! I love being able to stand at any angle in the living space and see the angles and character the wrap around hearth and mantle give! I think it ultimately comes down to the layout and plans you have for the remaining spaces around the fireplace — if you plan on adding built-in’s I’d recommend keeping it flush, if you’re using it as a solo feature piece I’d recommend wrapping it and creating that cozy, character the wrap around hearth gives! We did eventually add built-in cabinets next to the fireplace & I added floating shelves above — so there are still ways to add built-in features around a wrapped hearth so keep that in mind as well! Click here to see how we added built-in’s to our fireplace!
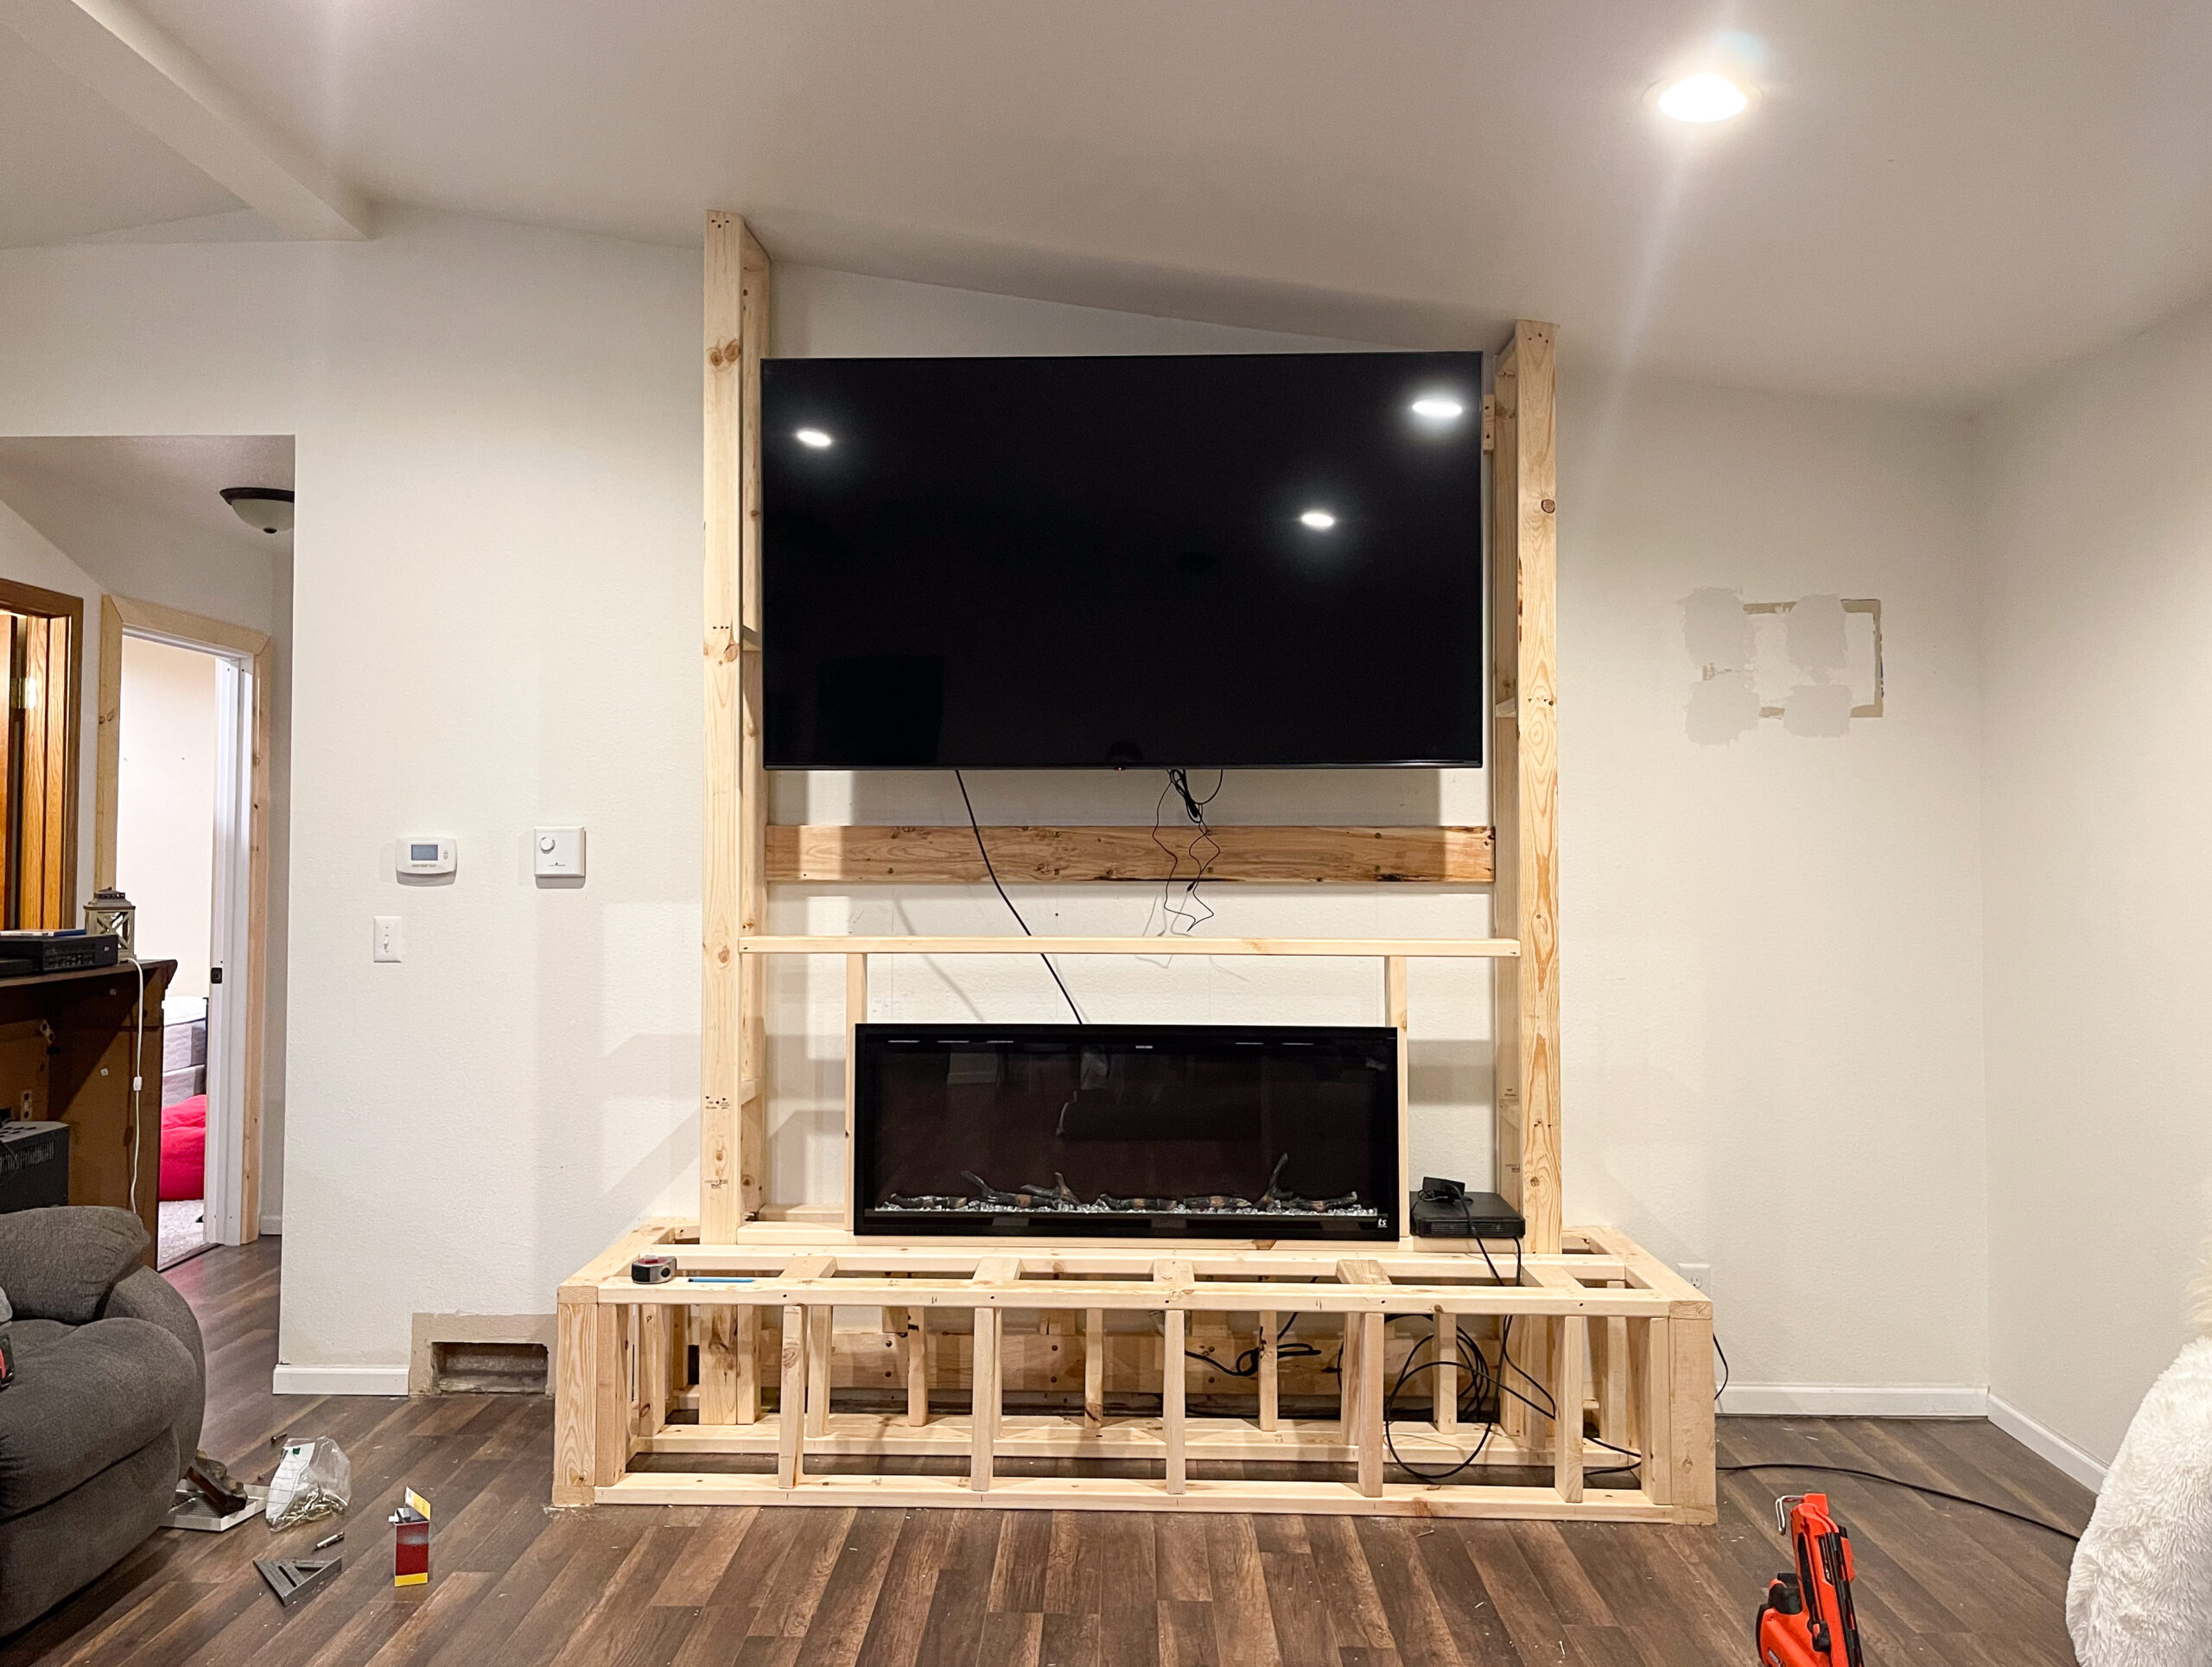
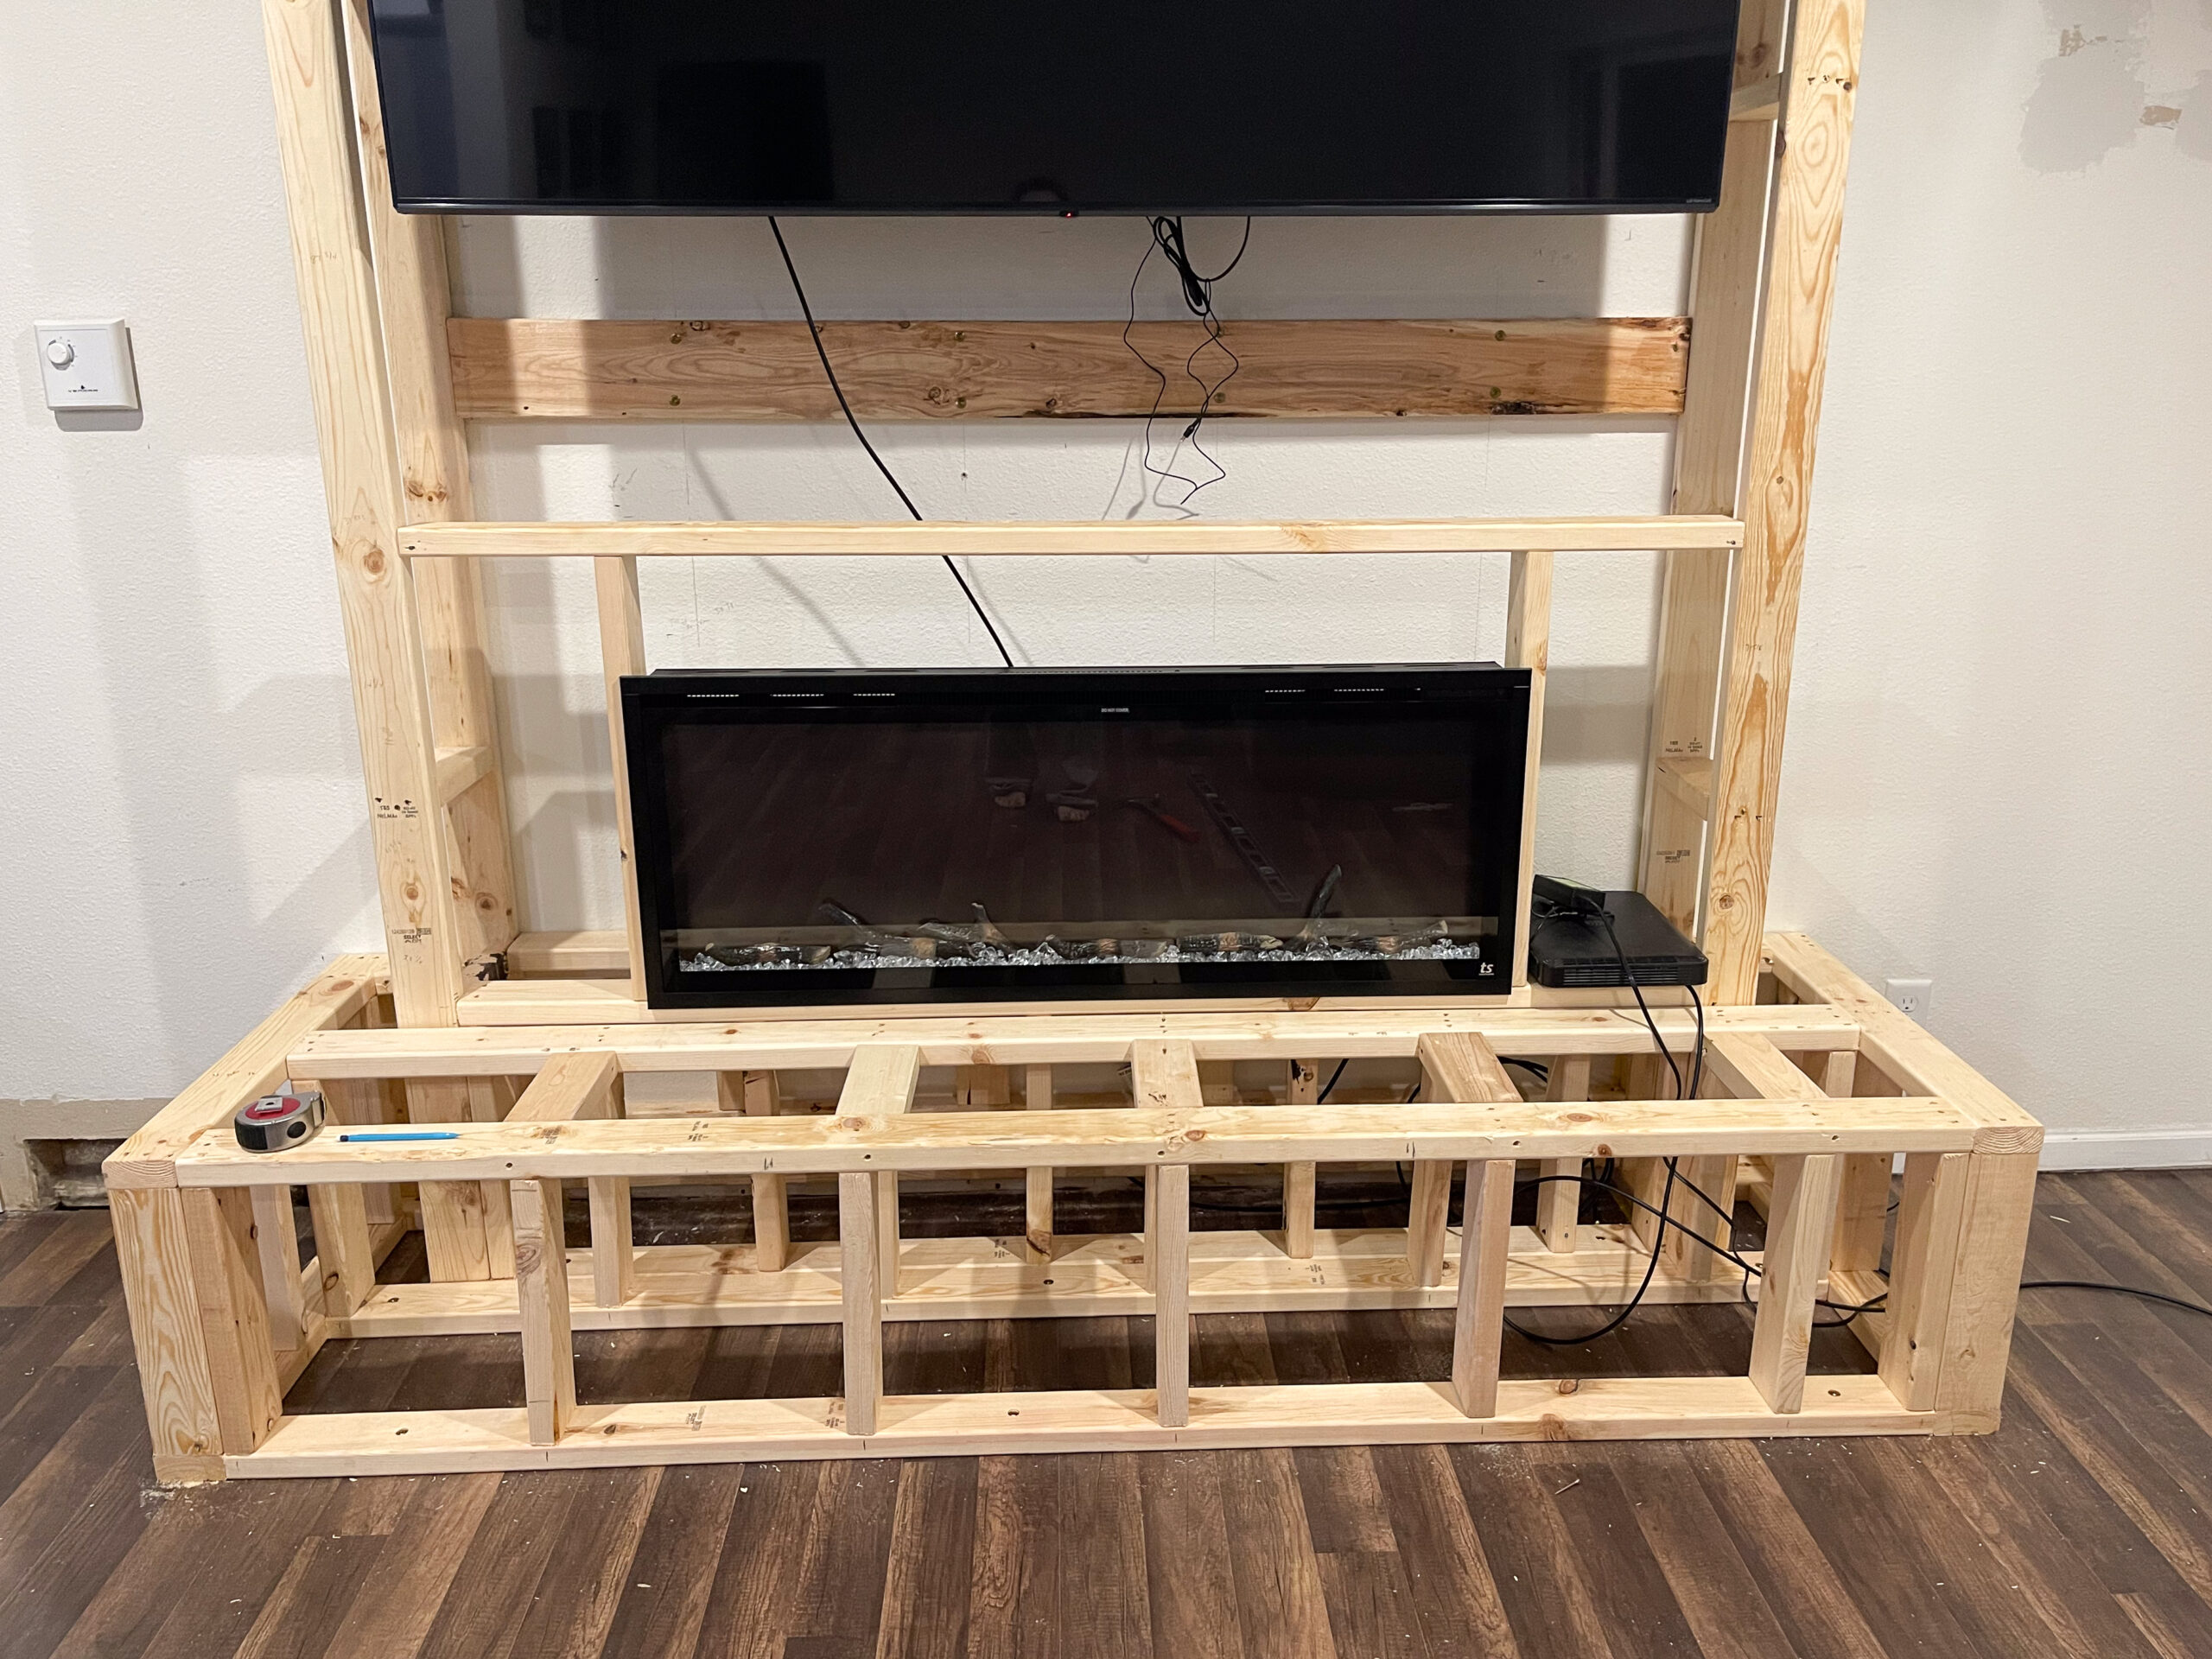
Then it was time to wrap the hearth and start framing in behind the TV. I planned on using shiplap on the face of the top half of the fireplace and I didn’t want the space behind the TV to look unfinished so we added some wood backing behind the TV so we could add shiplap behind the TV & blend it into the sides. So worth it!
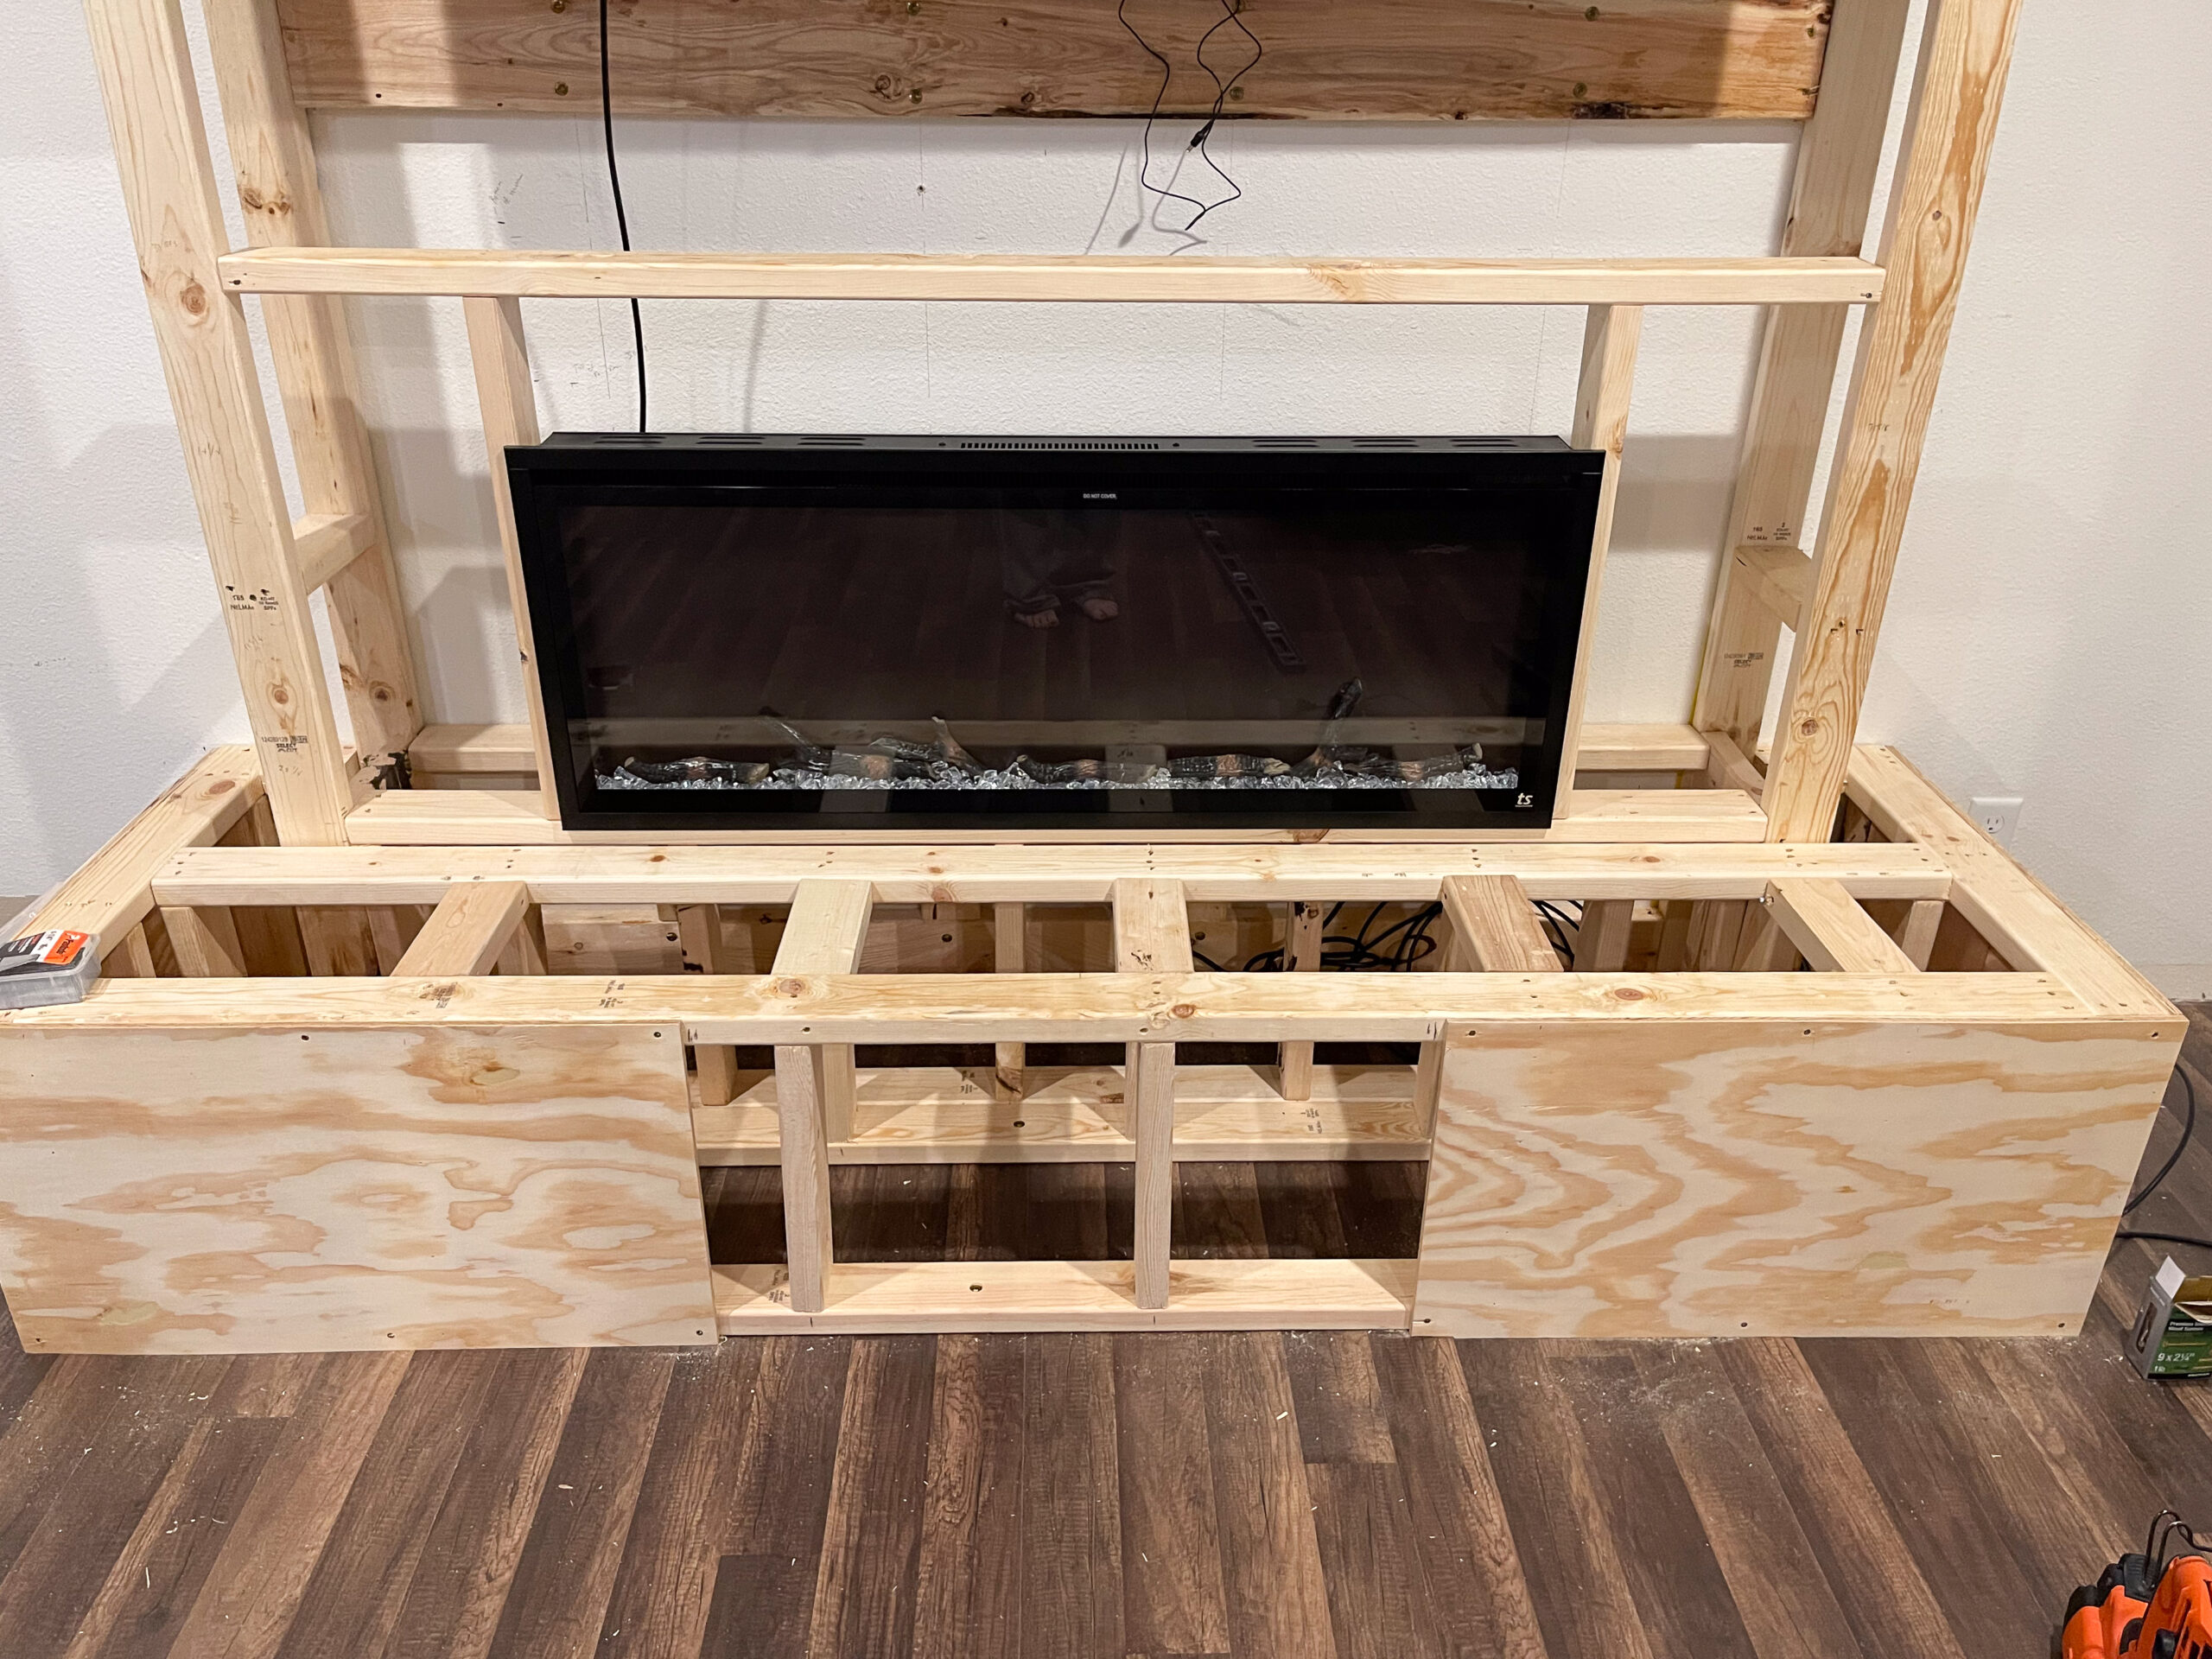
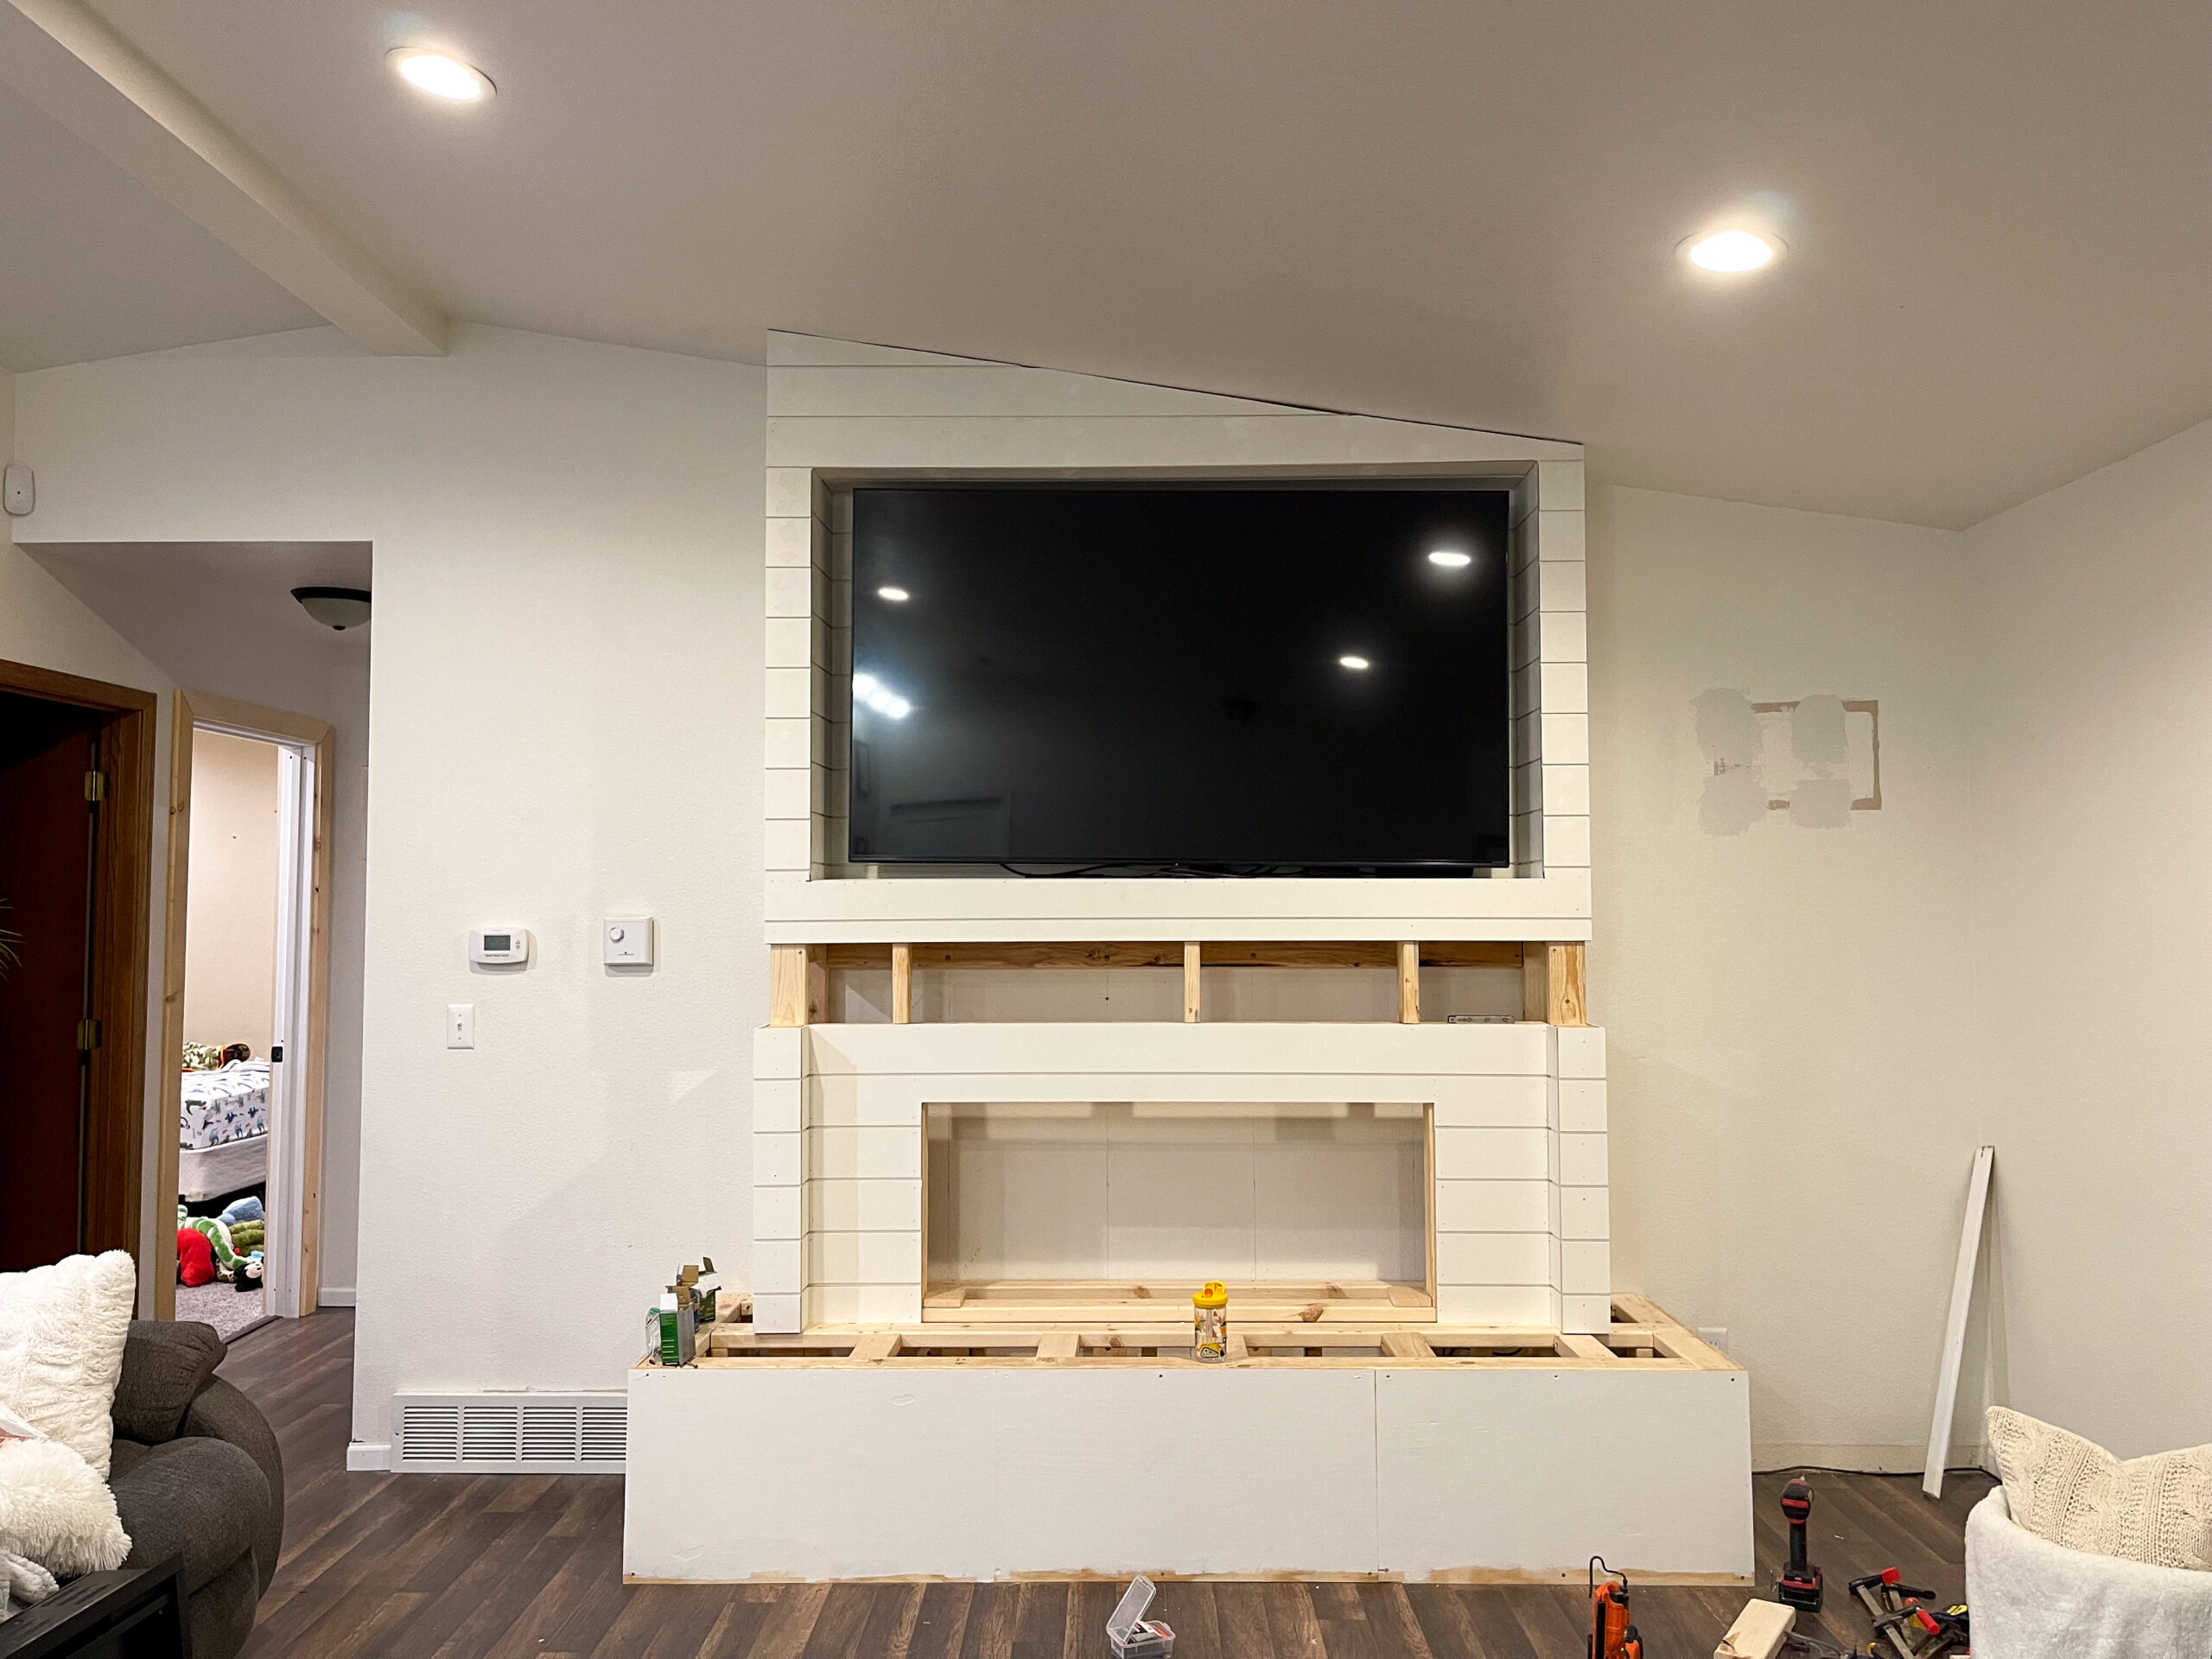
We added the shiplap into the inside first and I threw on the first coat of paint on the hearth. I like to do one layer of paint before filling holes/imperfections in the wood because I get a better idea of what areas needs to be filled or smoothed over when it’s in the color I’m painting with. Colten also added some wood slabs from the ceiling down to the top of the fireplace frame so we could attach the shiplap all the way up to the ceiling.

Once he had all his framing in place it was time to start adding the shiplap! Sure enough I forgot to take pictures of this as we were going along but here is once we had the shiplap added before the mantel! We started with the piece directly above the TV so where your eye was drawn to in the center was a sharp, full piece. From there it was easy to follow down the side – matching it up to the shiplap we placed behind the TV. Then we pulled the fireplace out and finished the lower half with the remaining shiplap.
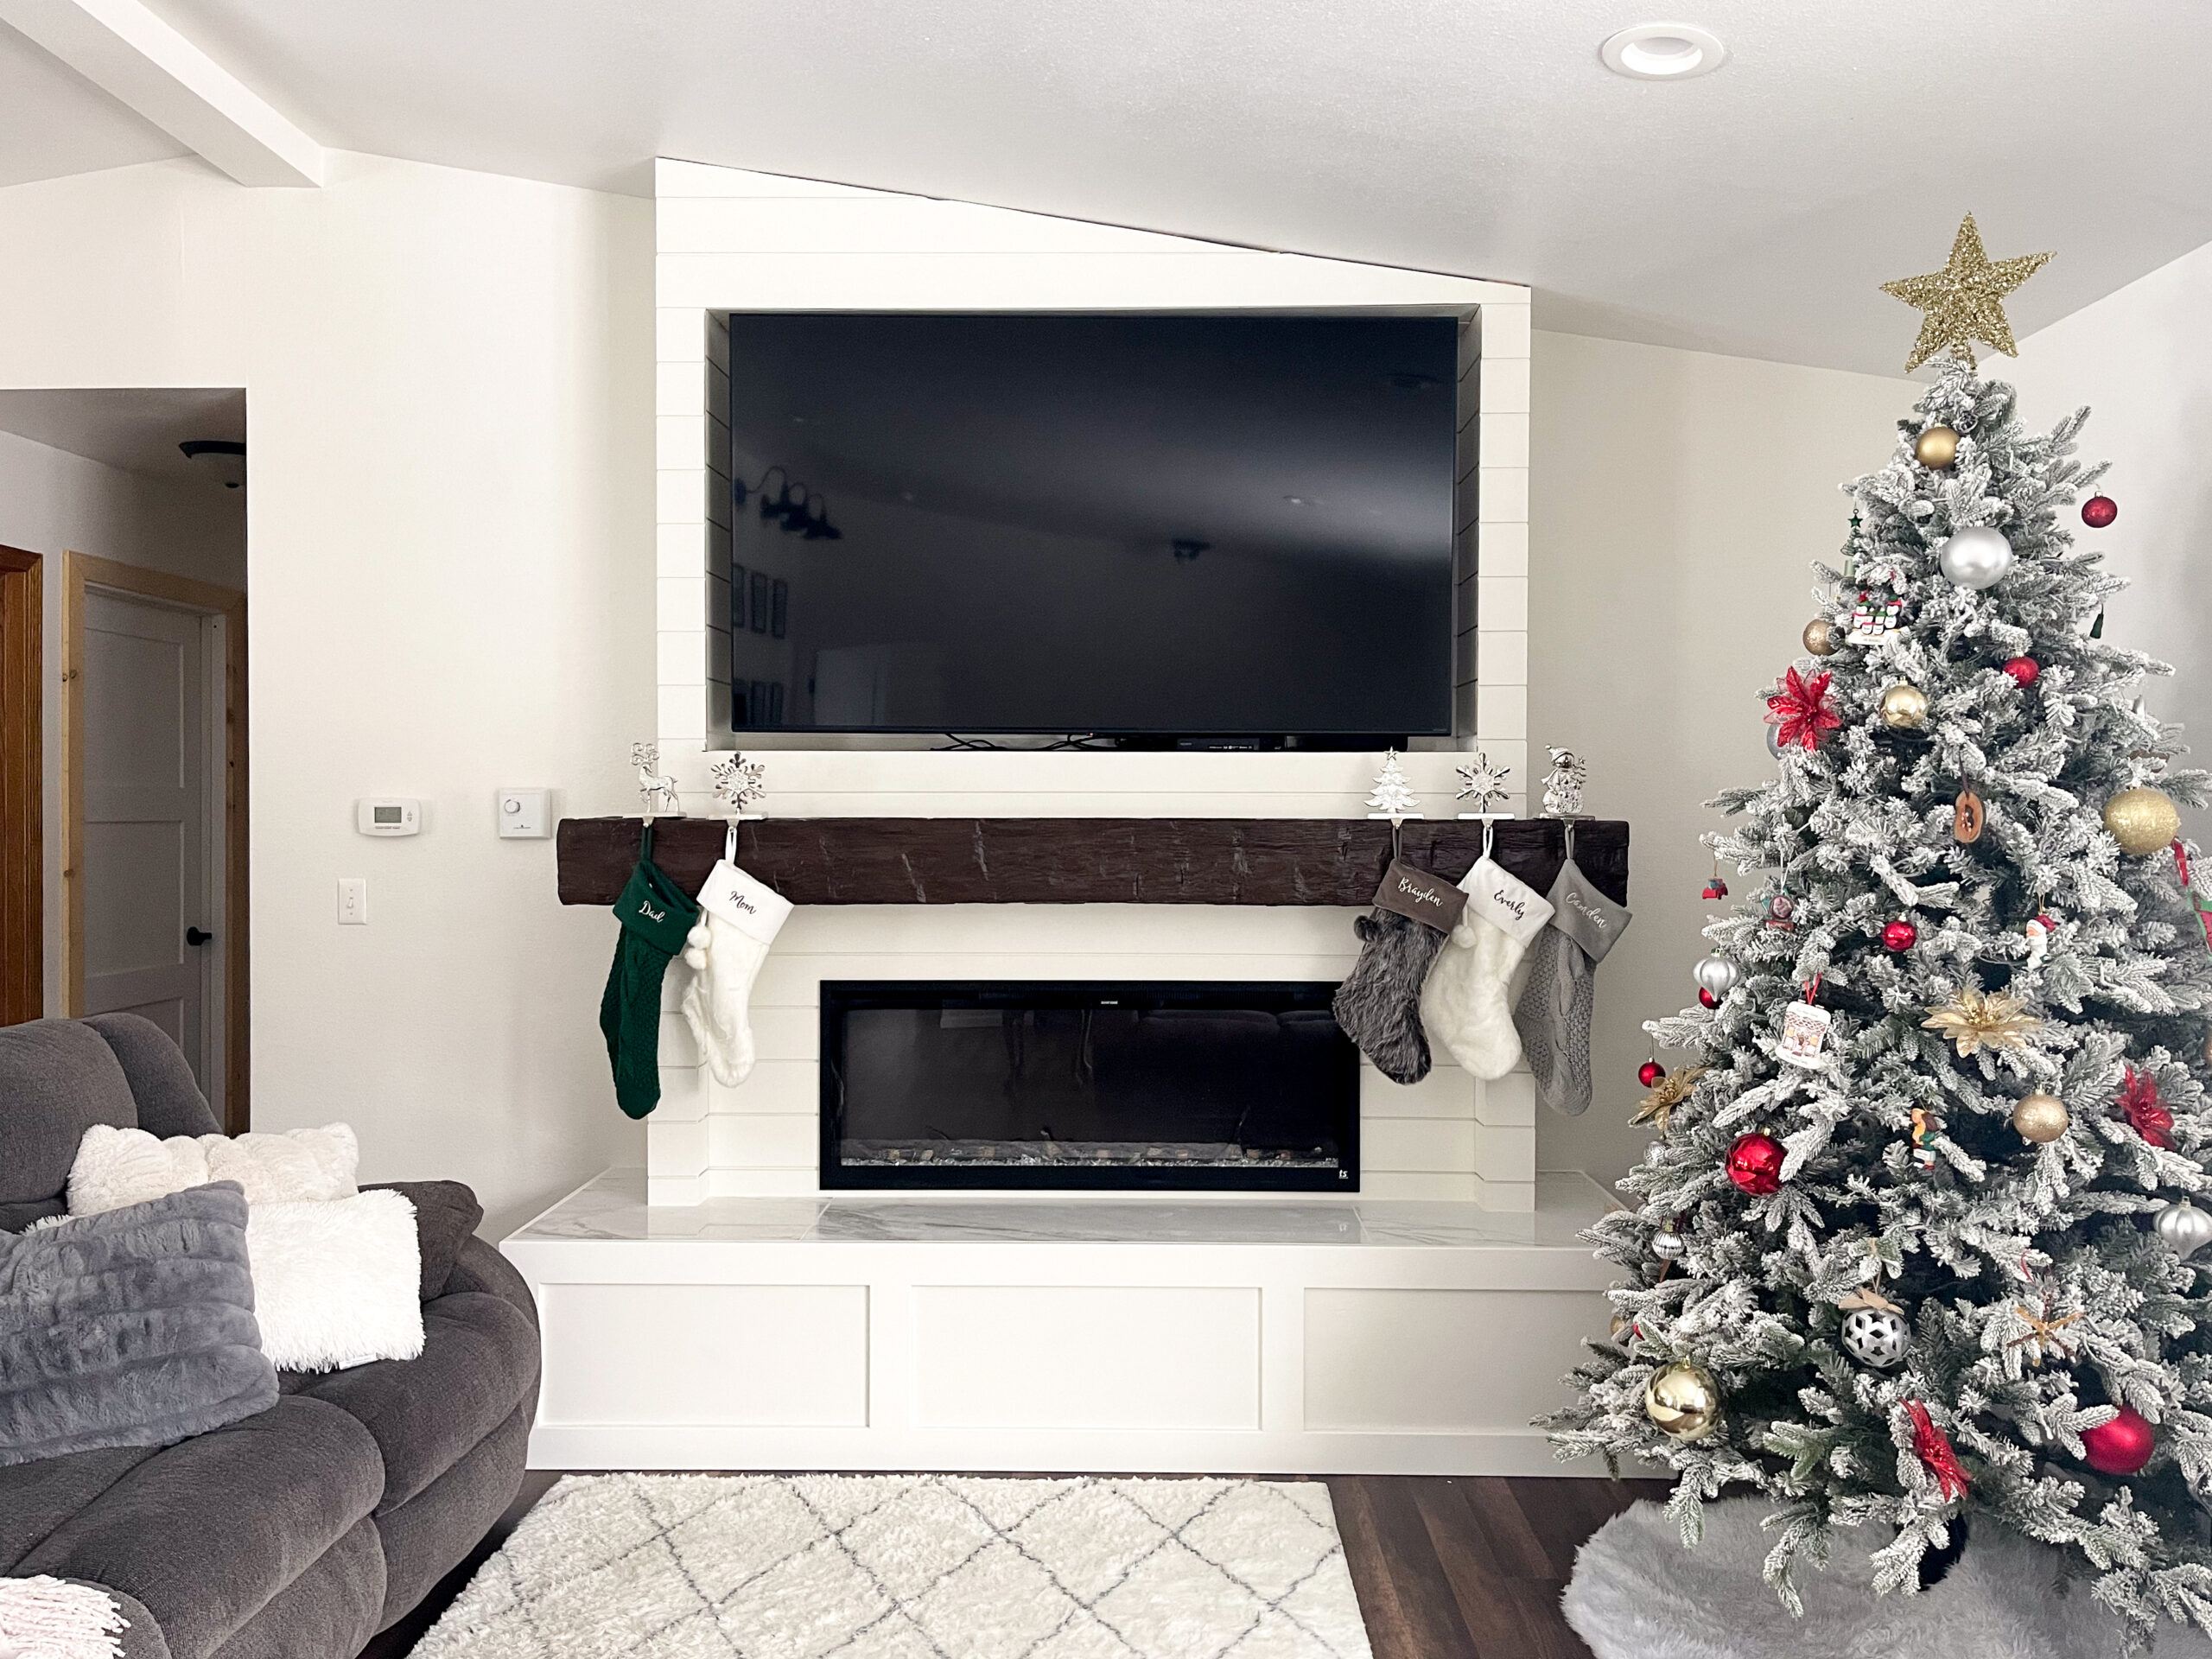
From there it was time to add the mantel! We have a lot of his deep, espresso colored wood color featured in the house so I knew that would be the perfect color for our mantel! Ironically enough, my parents had just finished a fireplace project of their own and had, almost to the exact foot, just enough left that would fit our fireplace. How perfect!


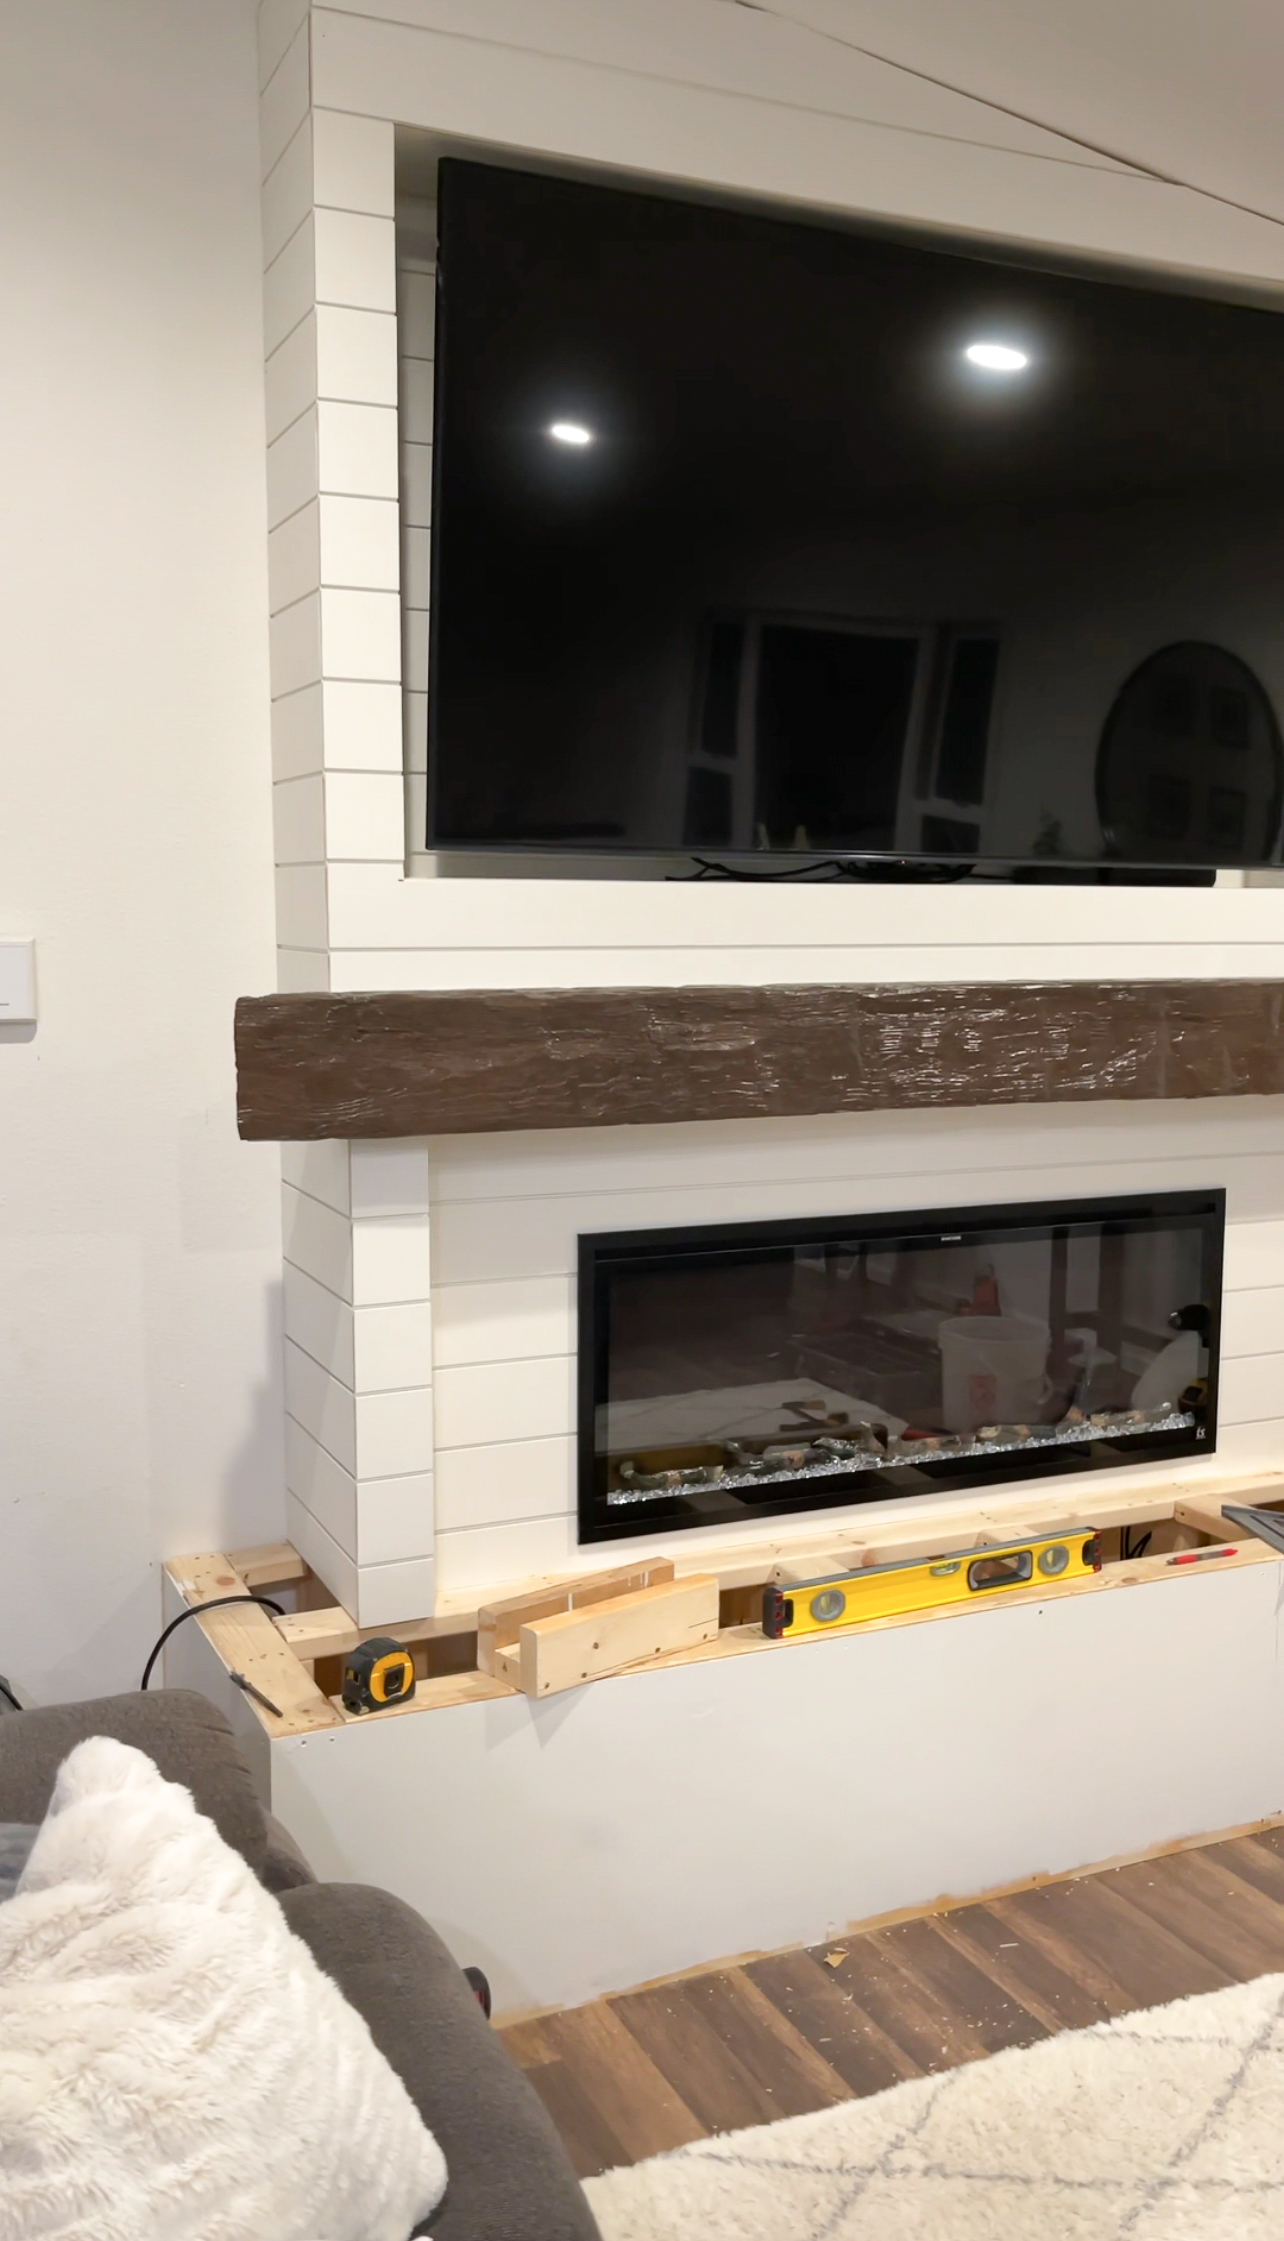
Once we had the tile (which is the only part of this project we actually “hired” out, specifically because we were having tile floors installed in our basement at the same time and he said he’d pop up and add the tile onto the bench for us since he was already there with all his tools and equipment, amazing!) we added a board and batten feature along the bottom of the hearth and caulked everything into place! I did the final coat of paint and we were finished, just in time for Christmas!
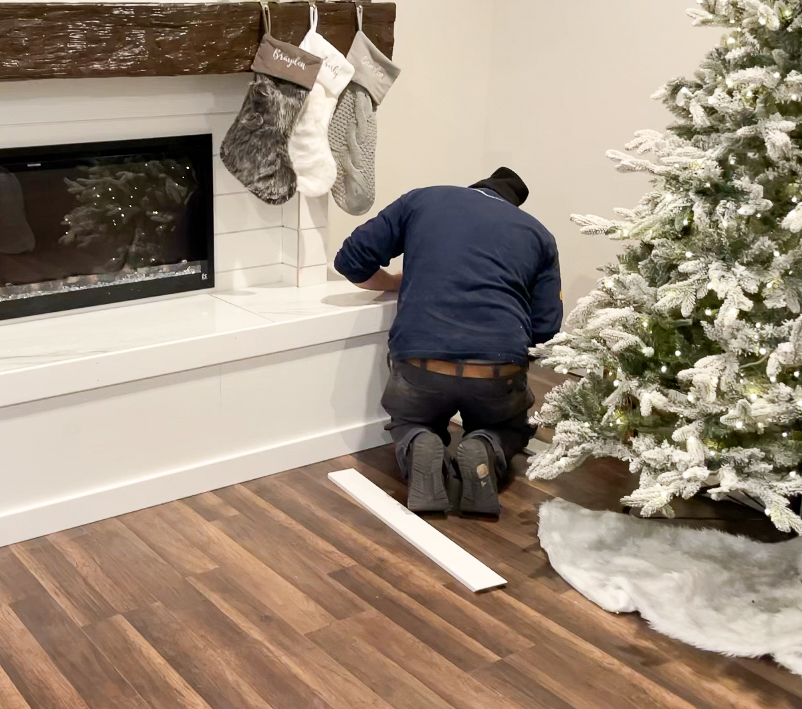
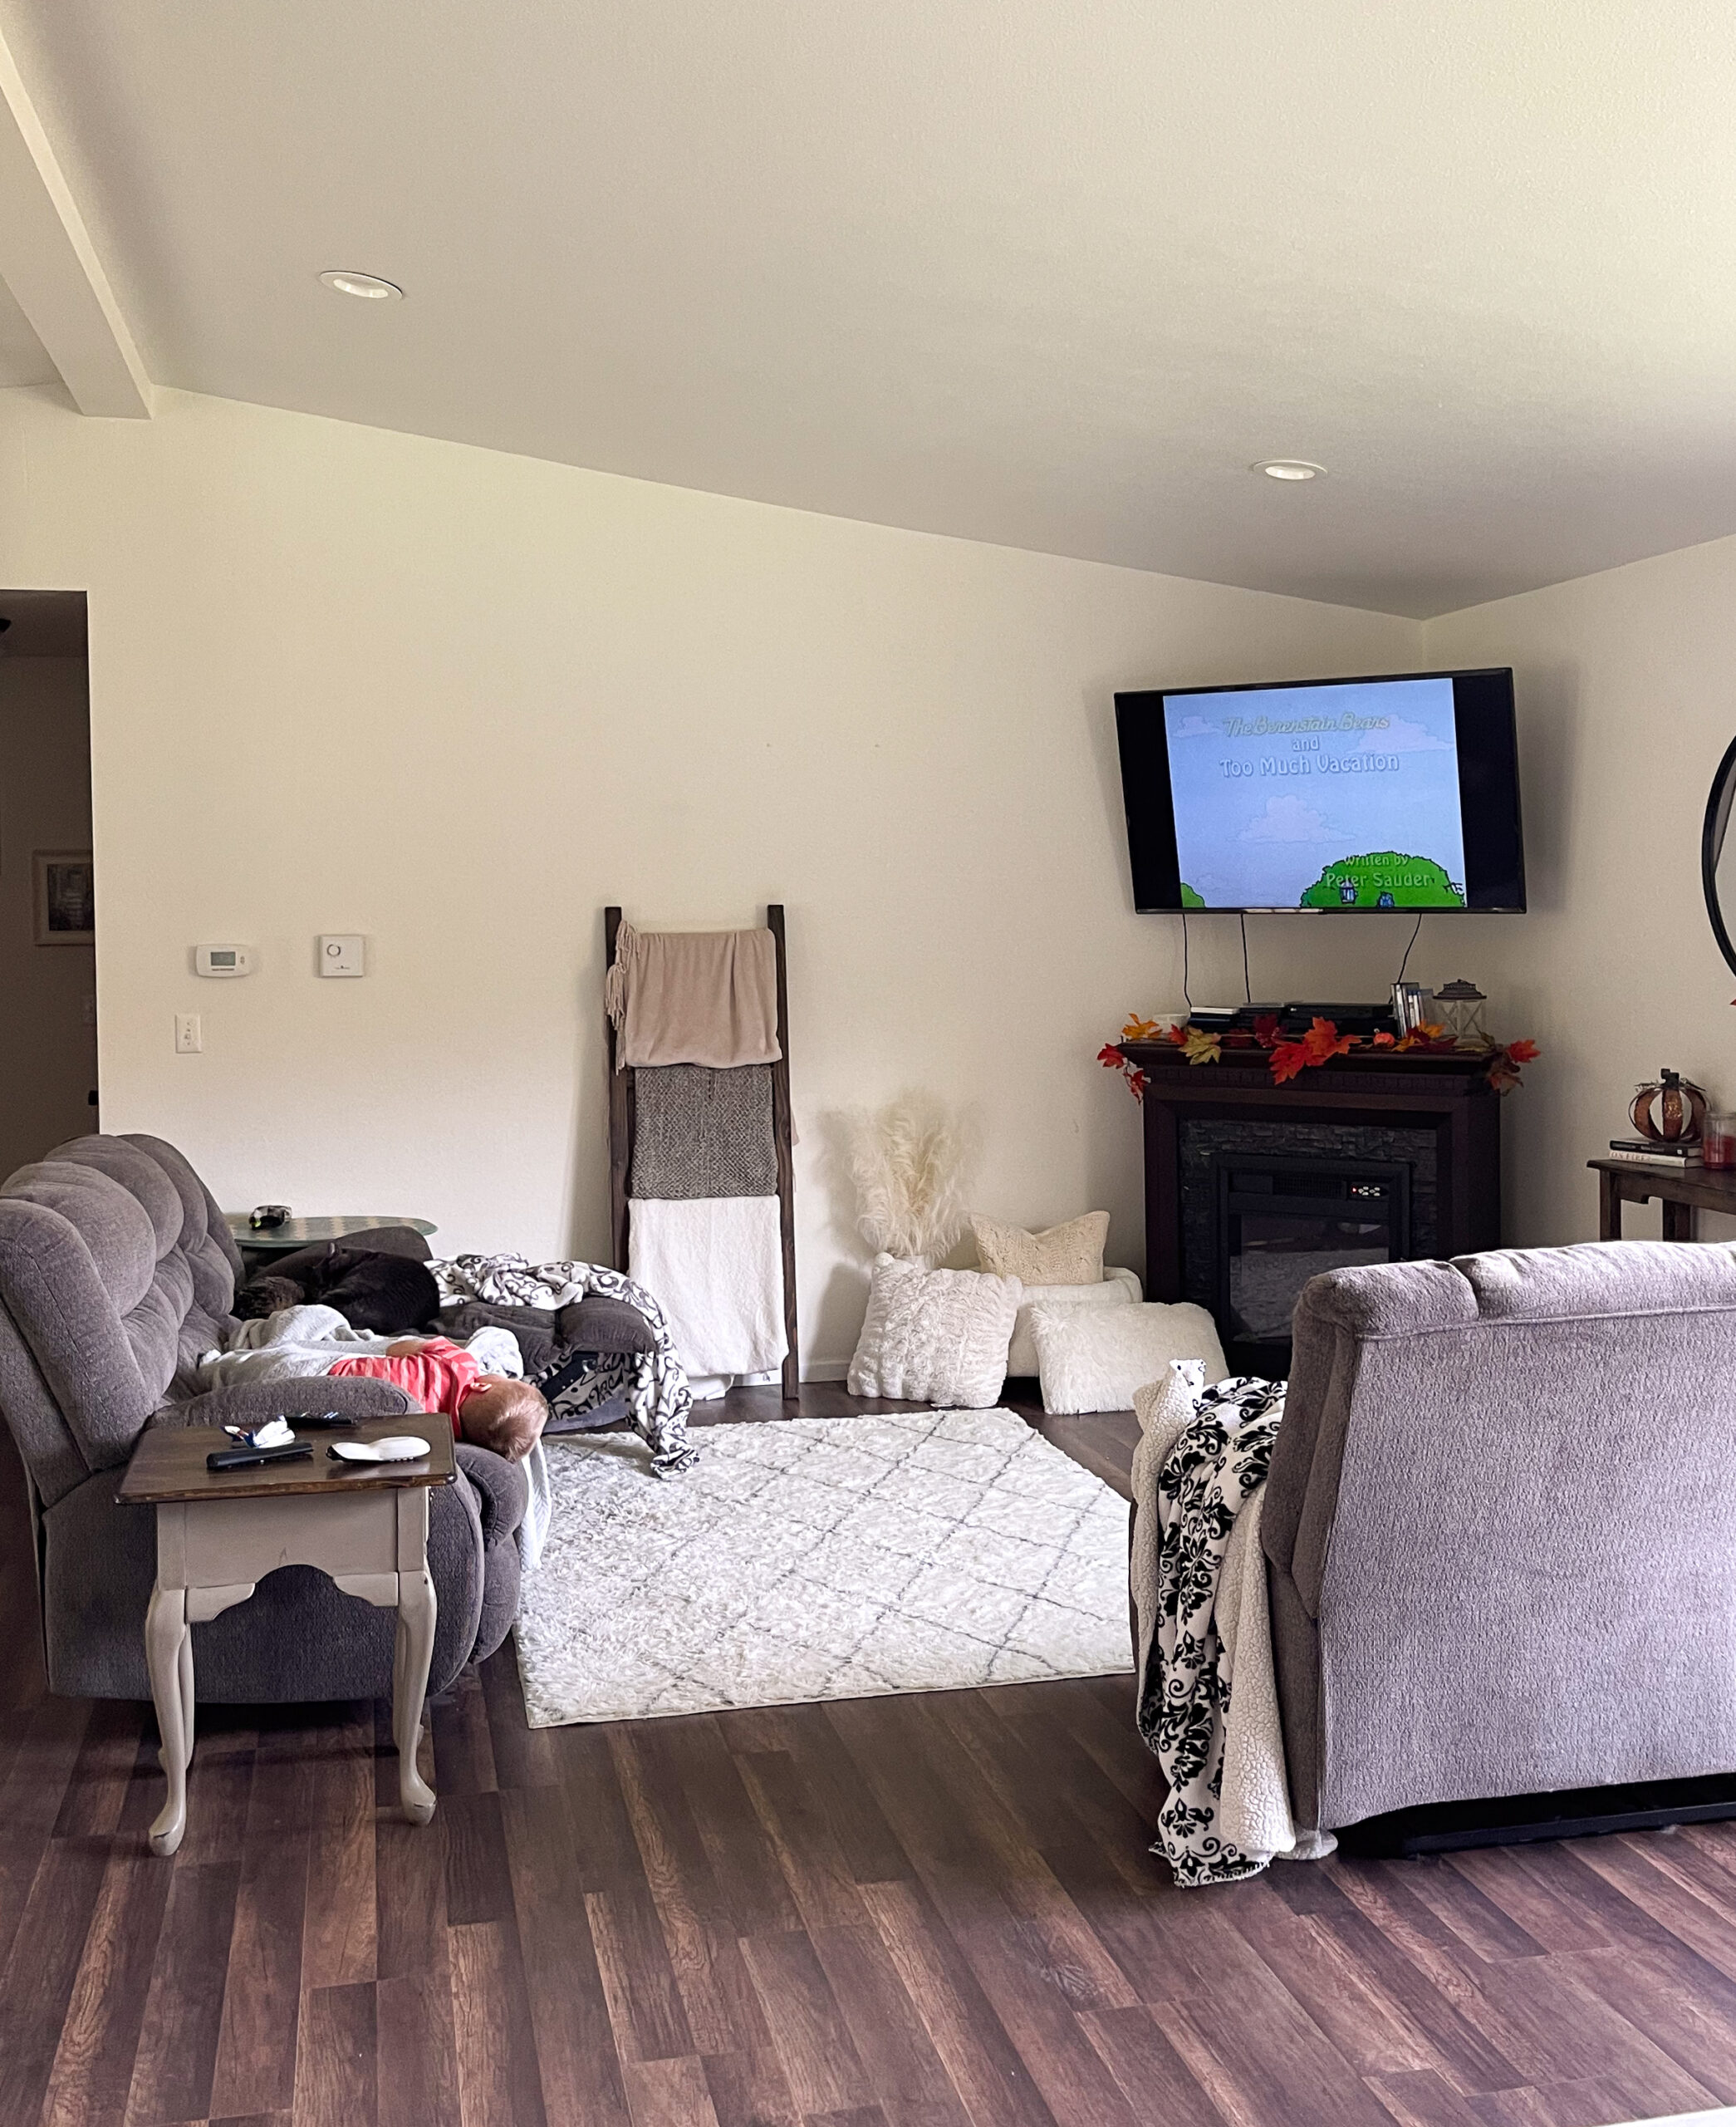
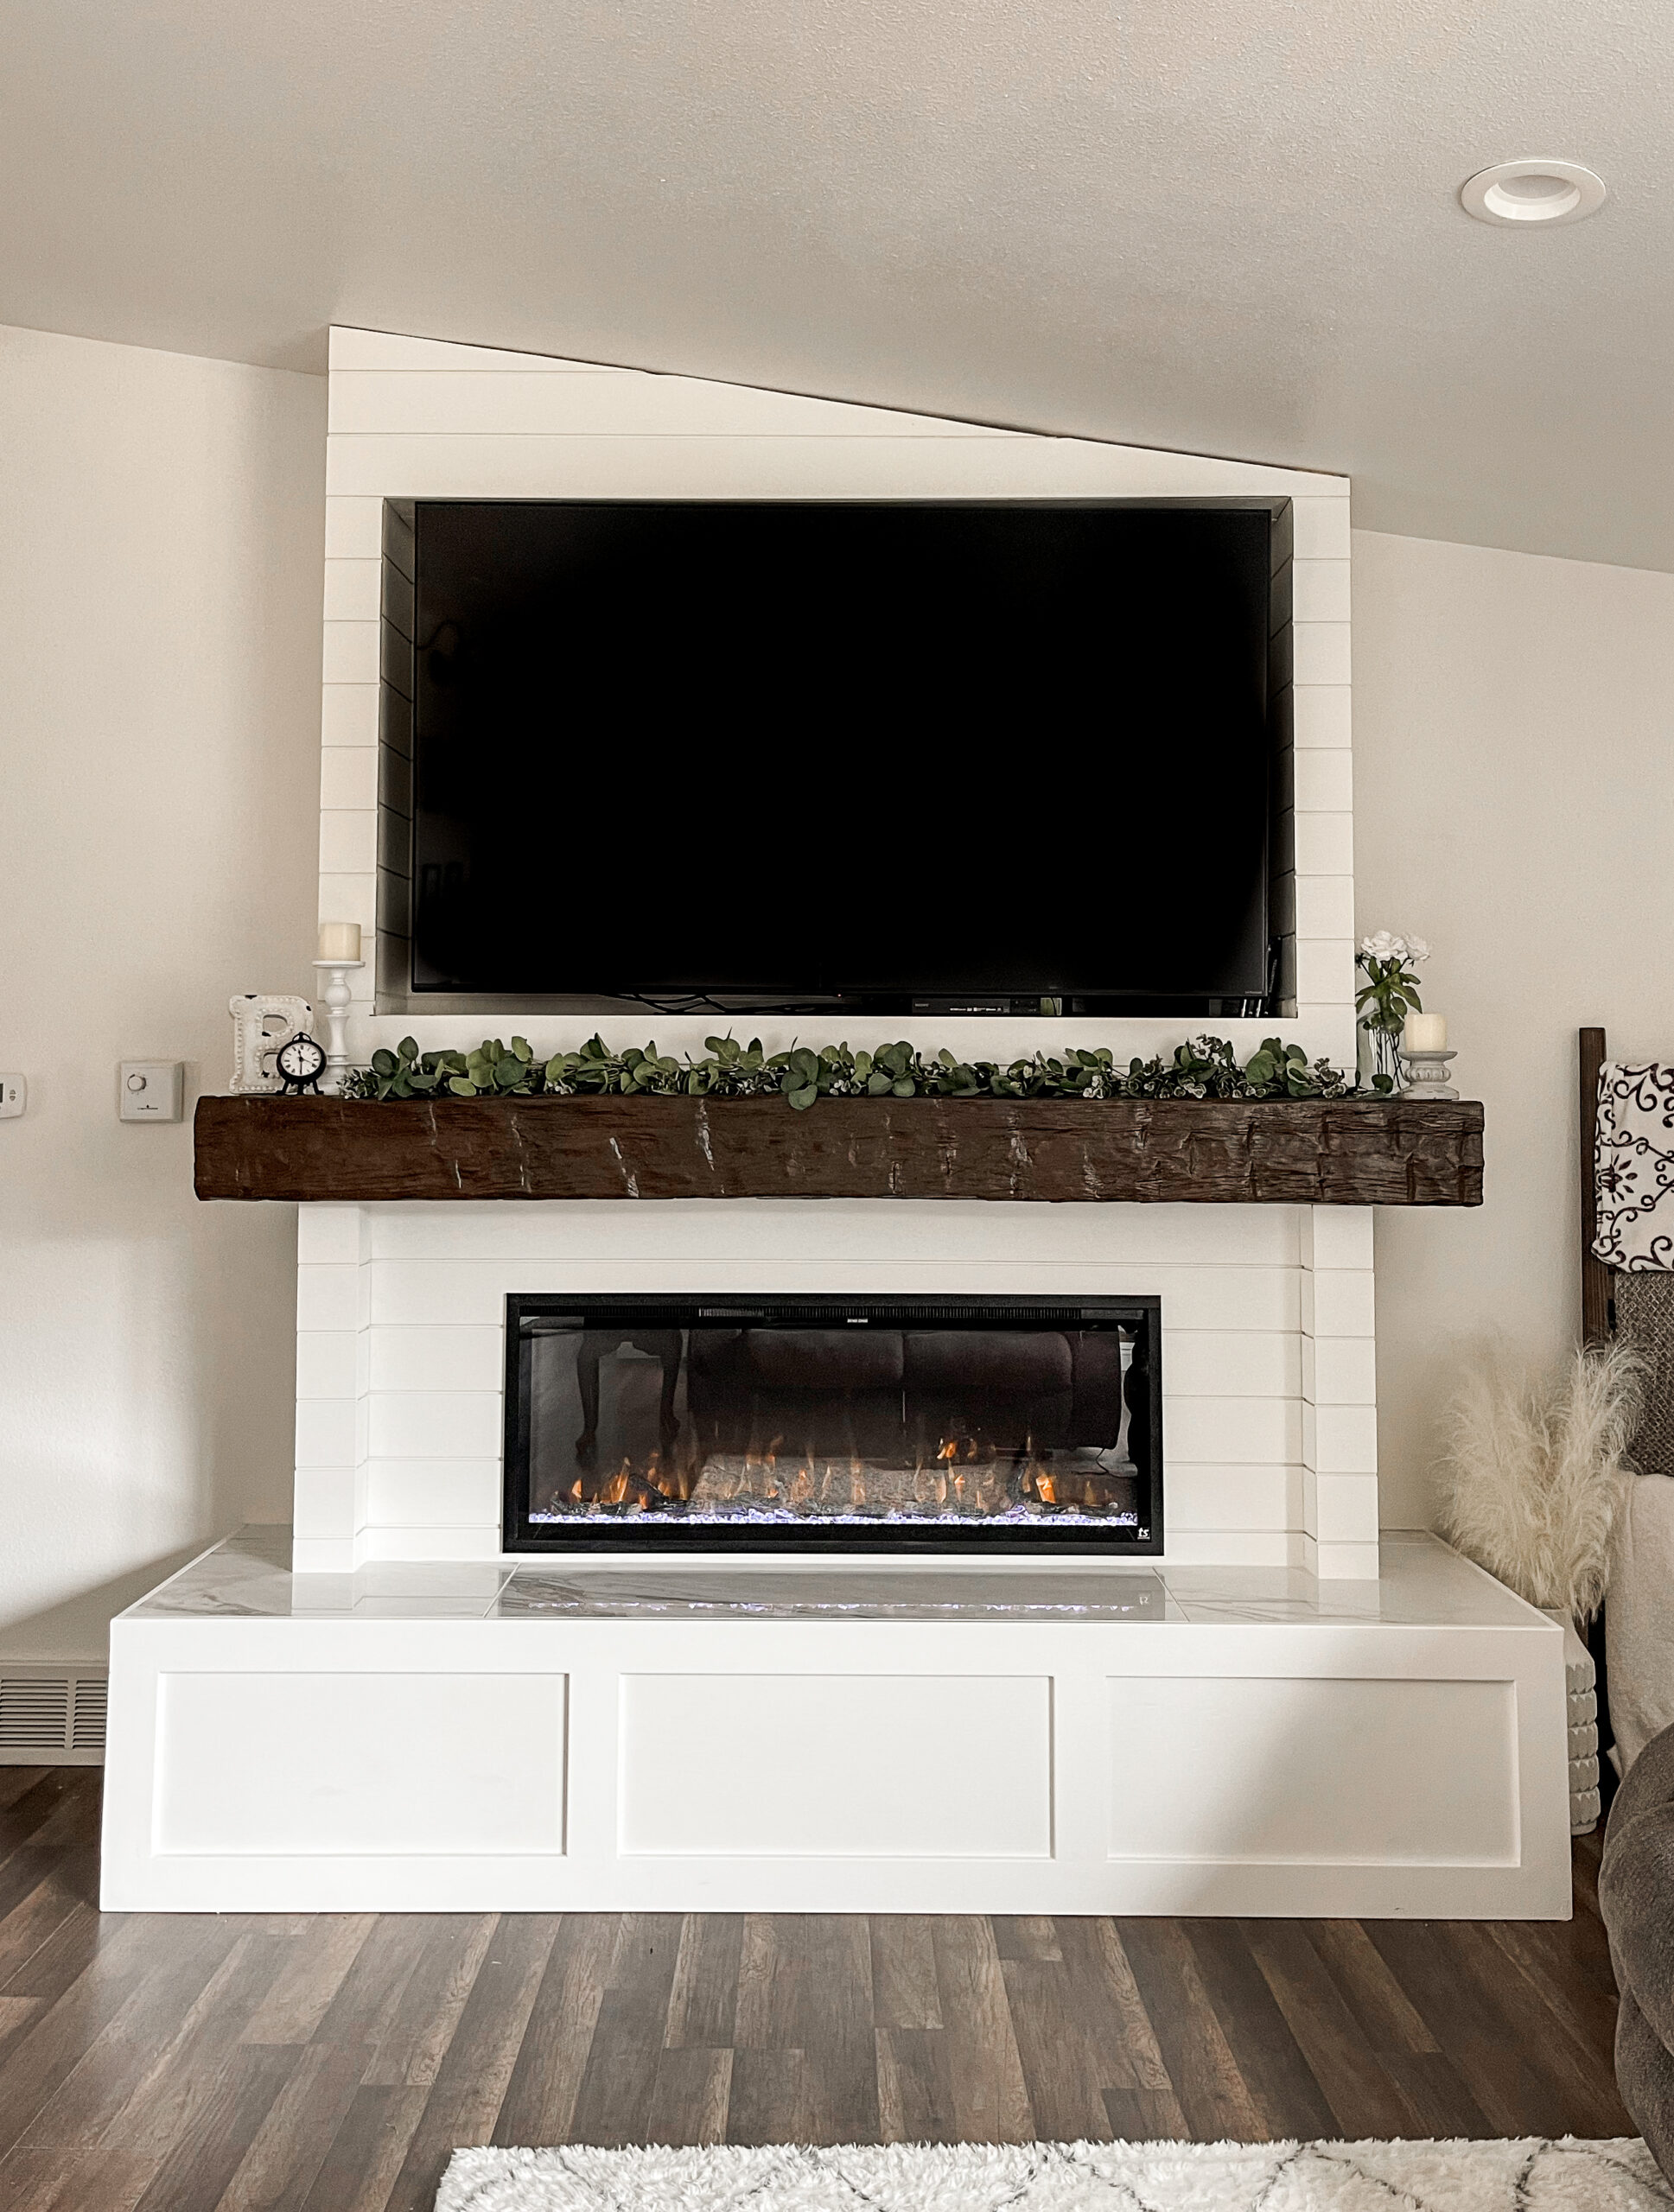
And here’s how it turned out! We plan to either caulk the top along the ceiling or add a moulding around it. I’m also deciding on if I want to add a thin trim frame around the edging of the TV cut out. But, for now, we will just turn the fireplace on, cozy up under our blankets, sip some hot cocoa, and enjoy the holidays!

Make sure to check out all my favorite fireplace decor essentials below!